Black Friday; was it worth shopping for cooking supplies?

Now when most of us think about Black Friday, this is what comes to mind.

https://www.youtube.com/watch?v=DigiWS1YhxI

This was not the case for me and a bunch others who had decided to have a calm Thanksgiving dinner and take our time to go shopping. Unlike many others who had made tents out in the cold weather to rush inside of a store by the time the clock struck 6:00pm.

No but seriously, what’s the point of calling it Black Friday if they started all the sales and door openers at 6:00 pm on a Thursday. It should be called Black Thursday if you ask me.

Moving back on topic, Black Friday is one of those great events that shows people what a good idea it is to be thankful for what they have on Thanksgiving and then afterwards run into a store and fight over some TV that was marked off.

Electronics are usually the most targeted items on Black Friday and some have very nice and reduced prices. As do cooking supplies.

Story Time!

My family and I decided to go Black Friday shopping at 11:00 so that the crowd had died down and plus we were in no rush. We went to our near by mall and checked some of the stuff out.

The mall, a place where I usually want to leave as soon as possible

Ya and that girl in the picture, a stranger by the way, thought it was funny to photobomb my picture.

Moving on, when we reached the cooking supply section, I was both amazed to see that prices actually were marked down on some of the items, while others were just phony.

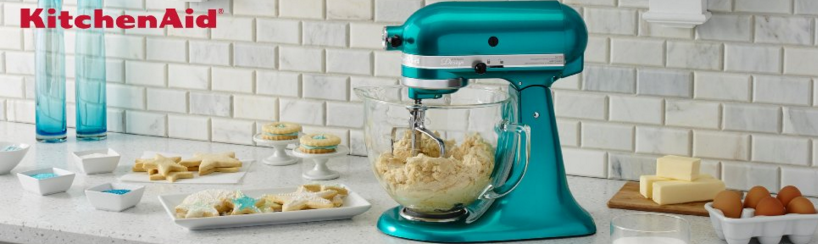
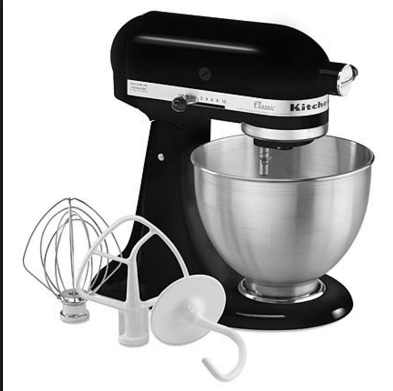
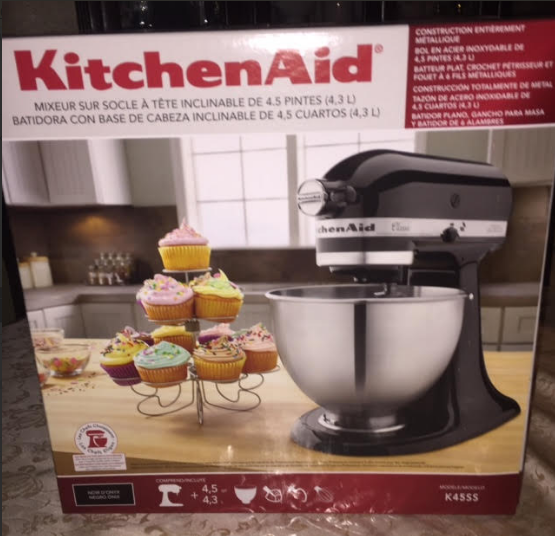
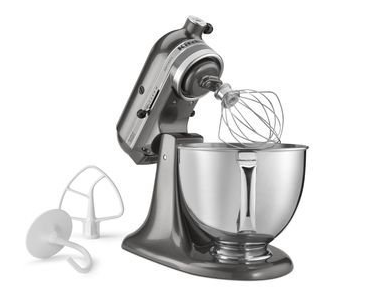
Let’s use an Artisan kitchenaid stand mixer for my example. Any website or store you go, they will always and I mean always will have  Artisan Kitchen-aid stand mixer at a price of $350 average, even Williams-Sonoma does and we all know how overpriced and cheap they are!

But when I saw that the stand mixer had a tag claiming the original price was $499 and that it was marked down to $350, I was outraged! What a shame from such a reliable store…

Screenshot 2015-11-29 at 2.15.50 PM

Tip: If you want to buy a Kitchen-aid stand mixer, don’t buy it on Black Friday, even websites sham about discounts these so called sales offer.

But, Black Friday is a really good opportunity to save some major bucks on pans and cookware if not stand mixers.

Screenshot 2015-11-29 at 2.14.51 PM  Screenshot 2015-11-29 at 2.16.27 PM  Screenshot 2015-11-29 at 2.16.09 PM

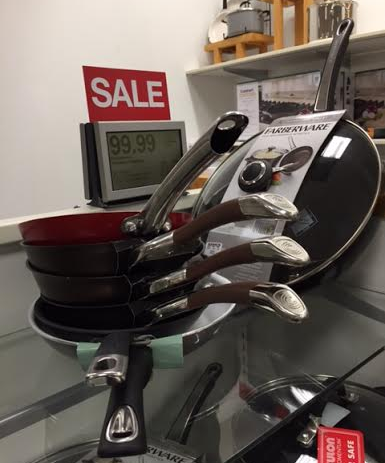
Their are so many great deals someone could get on skillets and nonstick scan pans if they decide to buy on Black Friday. Lets look at some examples below.

Screenshot 2015-11-29 at 2.16.19 PM     Screenshot 2015-11-29 at 2.15.02 PM

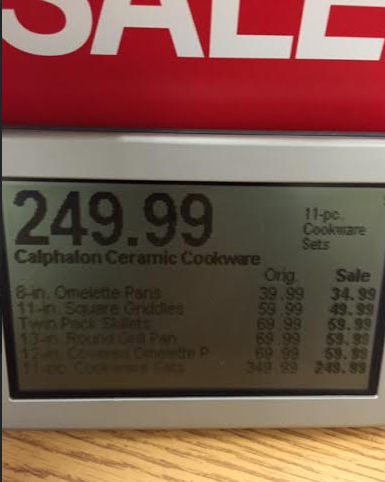
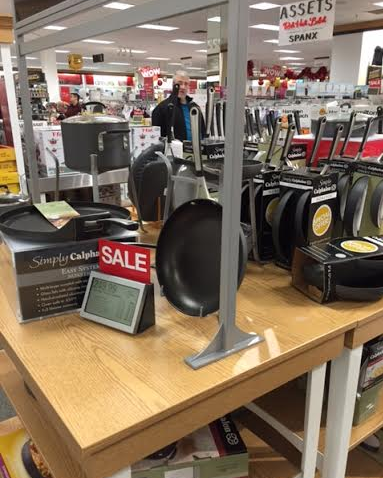
Considering from the research I have done and all the different outlets I have seen, most ceramic cookware sets for some reason are overpriced and always in the $300 dollar zone. But a set of 11 ceramic cookware, that too from a leading brand like Calphalon, is a big save.

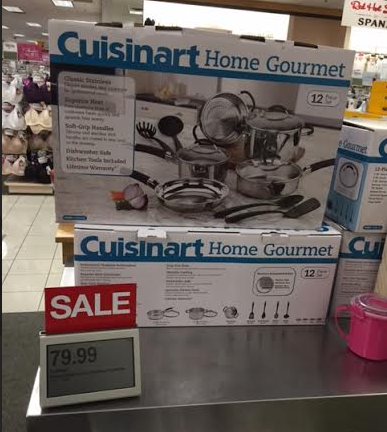
Stainless steel cookware pans, we all know how fancy those are. According to Sur la table, a set of 10 stainless steel pans are $499.95. Our friends back at Amazon had the same set of Cuisinart pans for $226 while Walmart sold the set at $199.85. But on that Black Friday, cuisinart was selling a set of 11 pans for just $79.99! Wow that’s a keeper, if I didn’t already have a set at home that box would have been the first thing in my shopping cart.

Summary:

If your going to buy some cookware and equipment from Cyber Monday or Black Friday or to be honest on any sales day, it is drum roll please….. Worth it. But as I had even said in my Kitchen-aid rating article I did before (https://bakedtothebone.wordpress.com/2015/11/10/kitchen-aid-stand-mixers-are-they-really-worth-it) , everything Worth it is to an extent. Even Black Friday Shopping.

There are some brands that you should just avoid and stay away from when it comes to shopping from sales. Avoid contact from buying Kitchen-aid product. Kitchenaid is a good brand don’t get me wrong, but don’t go running into a store when a sale comes around and be expecting Kitchen-aid to give a discount. I couldn’t even find discount on most of there stuff online! Buy their supplies on a given basis or when there is a coupon you get but don’t use the energy to only go into a store expecting sales on Kitchenaid, it just doesn’t happen. Plus lets be honest, a lot of their stuff is overpriced. I am not paying $200+ on one of there food processors! We all know Cuisinart food processors are better. Ooh I should write a article on that.

  Screenshot 2015-11-29 at 2.14.31 PM     Screenshot 2015-11-29 at 2.14.38 PM

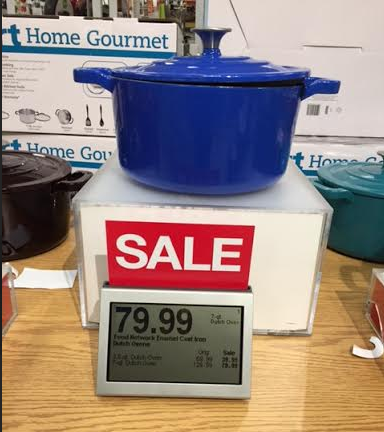
Other overpriced and sale shamming major brands to look out for and avoid on Black Friday or Sales are Food Network, Staub, or Le Creuset. They will repeat the process of stating a higher price the product supposedly was and claim the sale is what their original price is.

Screenshot 2015-11-29 at 2.15.37 PM

I was not born yesterday, I know that is not a Sale! who would pay so much for so little.

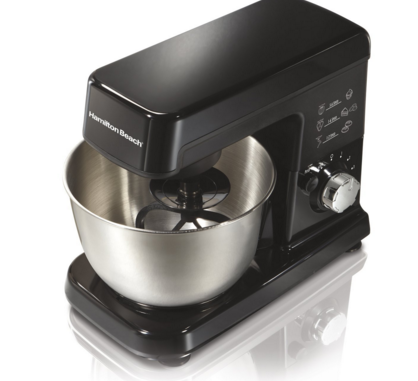
As you could obviously tell from reading the article so far, major brands that are worth shopping for and actually are generous to give even and fair sale prices are Cuisinart, Calphalon, and Hamilton Beach. 

I might not have had picture from Hamilton Beach products that were on shelf on Black Friday, but their were many coffee makers, breakfast makers, and much more appliances that Hamilton Beach was having reasonable sales on. A fancy $20 coffee maker with included accessories is definitely worth it!

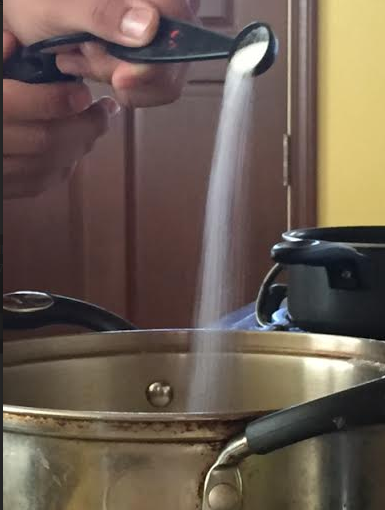
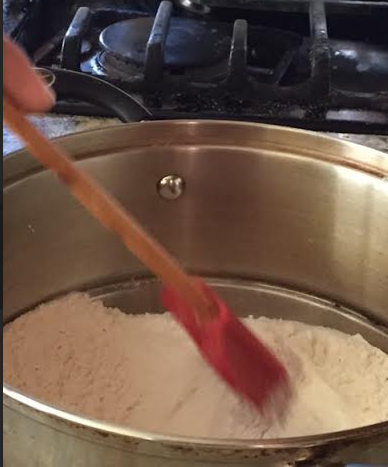
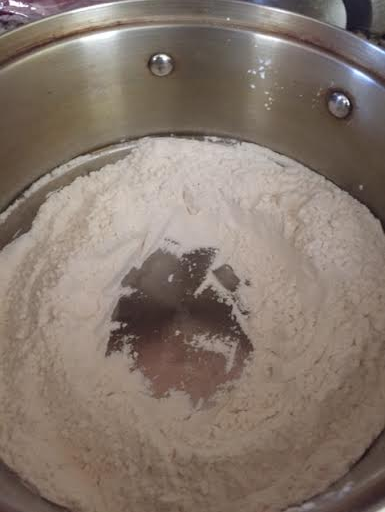
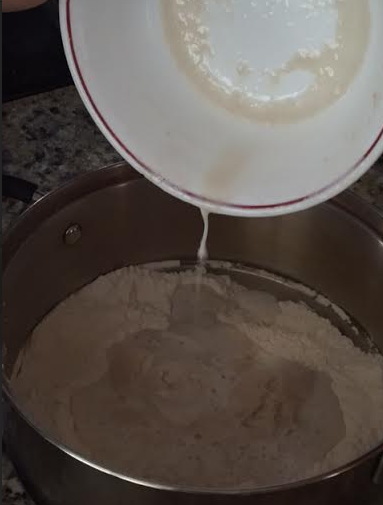
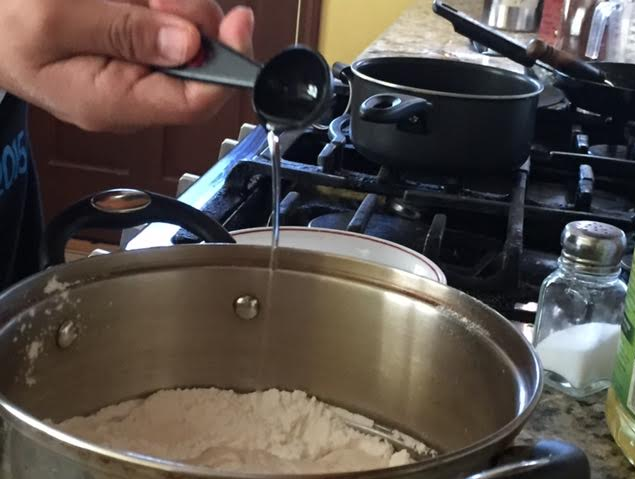
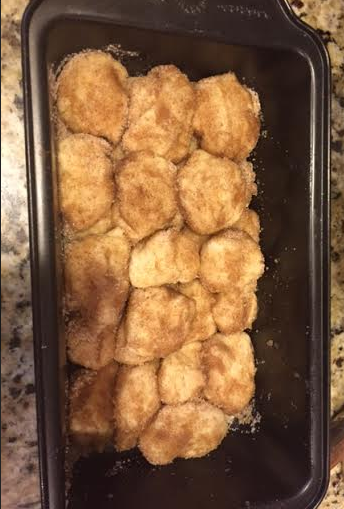
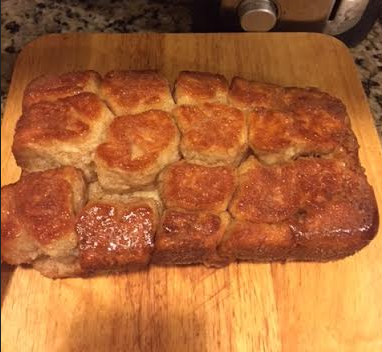
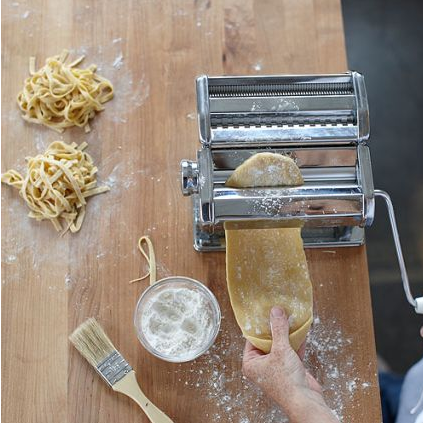
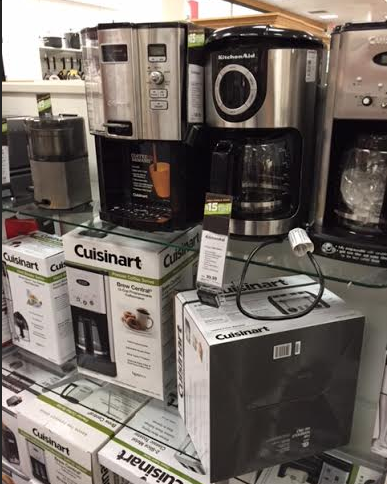
Here are the rest of the pictures I took from shopping that day on cooking supplies.

Screenshot 2015-11-29 at 2.14.08 PM  Screenshot 2015-11-29 at 2.14.15 PM   Screenshot 2015-11-29 at 2.14.24 PM

Screenshot 2015-11-29 at 2.15.58 PM    Screenshot 2015-11-29 at 2.13.44 PM

Screenshot 2015-11-29 at 2.15.11 PMScreenshot 2015-11-29 at 2.13.35 PM

Thanks again everybody for viewing and helping me reach 120 total views on my blog it really means a lot and if possible try to spread the word so we can raise the number of views. You can always contact me at zubairmuhammad827@gmail.com and check out my about me category at the top of the page to learn more about me.

– Chef/Author Zubair 


Cinnamon Monkey bread

Screenshot 2015-11-16 at 8.03.13 AM

 What other best way to treat kids or hungry teens than make monkey bread? These little bite size munchkins aren’t too sugary but that doesn’t stop them for being delicious and best of all unhealthy.

I personally made and thought of this recipe by myself making it a original but credit to Sur la table and Martha Stewart for some inspiration on the ingredient amounts I self chose. This recipe may seem challenging especially sine there are so any steps but that;s only because it’s bread, it’s actually a pretty simple recipe to follow.

Ingredients: 

  • 1 cup warm milk
  • 1 tablespoon active dry yeast
  • 2 1/4 cup all purpose flour (use 2 cups for mixture and 1/4 cup of flour for kneading)
  • 1/2 tablespoon canola oil
  • 4 tablespoons sugar
  • 1 teaspoon salt

For bread coating:

  • 1 cup sugar
  • 2 tablespoons ground cinnamon
  • 1/2 stick of salted butter

1. Start off by adding your one cup of milk in a saucepan and set on low heat and let sit till the milk is warm and not too hot, about 5 minutes . Note ignore if my stove looks like it’s on high, gas stove are screwed up so.. not my fault.

Screenshot 2015-11-16 at 7.44.19 AM   Screenshot 2015-11-16 at 7.44.32 AM

2. In a separate bowl, while the milk is heating up, add in your tablespoon of yeast and only add half of the sugar amount, 2 tablespoons of the sugar, with the yeast in the bowl. The other tablespoons of sugar will come in later.

Screenshot 2015-11-16 at 7.44.45 AM   Screenshot 2015-11-16 at 7.45.10 AM   Screenshot 2015-11-19 at 8.26.45 PM

3. At this point, turn your stove off and remove warm milk from heat. If the milk is releasing smoke or you feel it has heated up too much, no problem just let it sit for 2 minutes to warm. Add warm milk into yeast and sugar mixture and mix and let the bowl sit for 10 minutes so the yeast can wake up and absorb sugar.

Screenshot 2015-11-16 at 7.45.42 AM    Screenshot 2015-11-16 at 7.45.53 AM    Screenshot 2015-11-16 at 7.46.49 AM

4. While your bowl with the milk and yeast mixture is sitting, in a separate mixing bowl add salt, flour, and remaining 2 tablespoons of sugar. Though the ingredients at top call for 2 1/4 cup flour, use two cups of flour for this step and leave  the 1/4 cup for kneading.

Screenshot 2015-11-16 at 7.47.14 AM  Screenshot 2015-11-16 at 7.47.27 AM  Screenshot 2015-11-16 at 7.47.35 AM  Screenshot 2015-11-16 at 7.48.22 AM

5. At this point, your yeast mixture has sat enough and should have formed and look like oatmeal or a brown blob with bubbles if you let it sit for long enough. Using a rubber spatula, make a well inside the mixing bowl with the dry ingredients. A, well in case you didn’t know,is when you push off your ingredients to the side of the pan and leave a open gap in the middle in the pan. Add yeast mixture into gap.

Screenshot 2015-11-16 at 7.48.48 AM  Screenshot 2015-11-16 at 7.48.56 AM  Screenshot 2015-11-16 at 7.49.05 AM

6. Before mixing, add the canola oil on top of the yeast mixture in the well and mix.

Screenshot 2015-11-16 at 7.49.17 AM  Screenshot 2015-11-19 at 7.28.52 PM

7. Mix until the batter begins to turn sticky and form into a ball. Once the dough is formed and well mixed into a dough ball, cover top with a towel and place the bowl in a warm environment such as your un-preheated oven and let dough in bowl sit for 30 minutes.

Screenshot 2015-11-16 at 7.50.00 AM    Screenshot 2015-11-16 at 7.50.09 AM

8. After your dough has sat for 30 minutes, remove from war, environment and remove towel from bowl and your dough should have increased in volume or have rised if not doubled in size. Use half of your remaining 1/4 cup of flour and lightly dust a work space with flour and remove the dough from bowl into work space.

Screenshot 2015-11-16 at 7.50.18 AM   Screenshot 2015-11-16 at 7.50.30 AM   Screenshot 2015-11-16 at 7.50.43 AM

9. Add remaining flour on top of dough and slowly but gently, begin to knead the dough and press it and rolled it around with your fingers. Tip: for kneading dough, flour your hands as well so when you are kneading, the dough will not stick to your hand and kneading will become easier.

Screenshot 2015-11-16 at 7.51.13 AM  Screenshot 2015-11-16 at 7.51.05 AM

Screenshot 2015-11-16 at 7.52.33 AM    Screenshot 2015-11-16 at 7.50.58 AM

your dough should look like below once you have properly knead it. Smooth but not sticky.

Screenshot 2015-11-16 at 7.52.52 AM

10. Once knead, using a bench scraper or butter knife, cut your dough in half. From there cut dough into four pieces and from there, begin to cut each piece of dough into numerous tiny chunks so you at least have 20 to 25 small chunks of dough. Son;t worry if it is too small, this stuff rises in the oven a lot!

Screenshot 2015-11-16 at 7.53.35 AM   Screenshot 2015-11-16 at 7.53.43 AM  Screenshot 2015-11-16 at 7.54.04 AM

Screenshot 2015-11-16 at 7.54.11 AM  Screenshot 2015-11-16 at 7.54.22 AM  Screenshot 2015-11-16 at 7.54.50 AM

Screenshot 2015-11-16 at 7.55.06 AM

Now that we have our dough cut out into 20 bite size pieces, lets get started on the coating.

For bread coating:

  • 1 cup sugar
  • 2 tablespoons ground cinnamon
  • 1/2 stick of salted butter

1. In sauce pan, melt half stick of salted butter, once melted set aside.

Screenshot 2015-11-16 at 7.55.40 AM   Screenshot 2015-11-16 at 7.59.47 AM

2. Pour a very tiny amount of the melted butter (leaving the rest for later) in a 9 by 5 inch bread pan and using an empty butter wrapper, spread and rub the melted butter around the pan to grease.

Screenshot 2015-11-16 at 8.00.07 AM    Screenshot 2015-11-16 at 8.00.20 AM    Screenshot 2015-11-16 at 8.00.37 AM

3. In a bowl, add sugar and cinnamon and stir. Also, at this point you should preheat oven to 350 degrees.

Screenshot 2015-11-16 at 7.56.35 AM    Screenshot 2015-11-16 at 7.59.58 AM

7. For this next special step, grab one of your dough chunks and using your hand, roll it into a ball. Once a ball, dip the dough into the remaining melted butter to get it all wet. Then, roll the greased up dough ball into the bowl of the cinnamon sugar mix so the ball is well coated.

Screenshot 2015-11-16 at 8.01.02 AM   Screenshot 2015-11-16 at 8.01.22 AM    Screenshot 2015-11-16 at 8.01.52 AM

8. Stick your cinnamon coated dough ball into the corner of the pan and repeat step 7 until all dough pieces are buttered up and cinnamon sugar coated and attached onto the pan neatly.

Screenshot 2015-11-19 at 8.08.25 PM  Screenshot 2015-11-16 at 8.02.25 AM    Screenshot 2015-11-16 at 8.03.37 AM

9. This step is optional but I recommend it. Cover prepared pan with the bread with a towel and let it sit for 15 minutes so it can rise a little more. After 15 minutes, remove towel and place prepared bread pan into preheated 350 degree oven and let the monkey bread baked for 20 minutes.

Screenshot 2015-11-16 at 8.02.44 AM   Screenshot 2015-11-16 at 8.03.44 AM   Screenshot 2015-11-19 at 8.08.33 PM

10. After 20 minutes, remove the pan from the oven and your baked monkey bread bread should look as below.

Screenshot 2015-11-19 at 8.08.40 PM   Screenshot 2015-11-16 at 8.03.06 AM  Screenshot 2015-11-16 at 8.03.13 AM

Turn bread pan over and transfer Monkey bread to a drying rack or counter so it can cool. Note if the dough below looks different than the pictures aboe this sentence, that’s because the pictures above show how the top of the bread looks, the picture below shoves the loaf turned upside down so naturally it browned more. It’s still the same bread from the pictures above. Easily pull a chunk off and enjoy cinnamon monkey bread. It’s delicous!

Screenshot 2015-11-16 at 9.42.29 AM    Screenshot 2015-11-16 at 9.46.29 AM


Thanks again everybody viewing my post and everyone who have also viewed some of my other posts. I now have a total of 110 views on this blog! Thanks everybody for your support and spread the word about this blog and hopefully by my next post, we can get more views.

– Chef/author Zubair 


Fall fresh pasta cooking class at Sur la table

Screenshot 2015-11-13 at 10.03.08 AM
http://www.surlatable.com/sku/2345981/Fall+Fresh+Pasta+Workshop

So recently, in the Tuesday that just passed, I signed up for and took a Pasta making class at sur la table (https://bakedtothebone.wordpress.com/2015/10/28/sur-la-table-cookware-store-and-cooking-classes/) go ahead and click or visit the link above please and thanks.

Before we start in case any if you were wondering ‘I don’t care about any sur la table class or cooking class he takes’, that’s sort of the main idea. My goal through these personnel experiences post on my cooking classes at Sur la table are meant to inspire you or encourage you to maybe try to take a cooking class every now and then just to see, it’s really just an amazing learning experience taking a Sur la table cooking class, look into it if you get the Chance 🙂

Moving on, the main highlights of the class were that I was the only person who signed up so it’s a bit ironic since usually most of their classes are filled but at least I got to have more opportunities and a solo hands on learning environment with tons of cooking. Plus the class was taught by the great chef Amber Lancaster, Which made things more special.

The menu of the class was

  • Homemade Pasta Dough
  • Cheese Tortellini with Roasted Cauliflower, Bacon and Sage
  • Pappardelle with Kale, Italian Sausage and Arrabbiata Sauce

The over all experience was tons of fun as the two of us spent one and a half hour of the two hour class having to just work with the dough, make tortellini’s out of them, wait for them to dry, and so forth.

We had to start off class rolling out and making the dough. (the lady using the rolling pin was chef Amber Lancaster)

Screenshot 2015-11-11 at 9.40.36 PM     Screenshot 2015-11-11 at 9.40.54 PM     Screenshot 2015-11-11 at 9.41.03 PM

From their I got to use the kitchen-aid stand mixer attachment for rolling out the pasta. And yes that guy in the picture is me… no comments.

Screenshot 2015-11-11 at 9.41.14 PM    Screenshot 2015-11-11 at 9.41.21 PM

After making hundreds of fettuccine noodles and somehow still having leftover dough, we let our professional home made, not store packaged, pasta dough dry out on a pasta rack.

Screenshot 2015-11-11 at 9.41.29 PM      Screenshot 2015-11-11 at 9.42.09 PM

Note that these are actual pictures I took during the class. Once all of are noodle based pasta were hung up, we still had so much dough leftover and from there we began making small tortellini’s. And yes that knife below we used is Wusthof, the best product cutlery a chef could buy, Sur la table always offers one to class attendees to use during class since sur la table only uses the best of the best.

Screenshot 2015-11-11 at 9.41.37 PM    Screenshot 2015-11-11 at 9.41.44 PM

Finally after assembling all of the pasta we made and hour and thirty minutes into the class, next came the time to work upfront on the stove and began on boiling the pasta and making the sauces. Here are some pictures from the cooking we did for the rest of class.

Screenshot 2015-11-11 at 9.41.54 PM   Screenshot 2015-11-11 at 9.42.01 PM   Screenshot 2015-11-11 at 9.42.19 PM

Screenshot 2015-11-11 at 9.42.25 PM   Screenshot 2015-11-11 at 9.42.25 PM  Screenshot 2015-11-11 at 9.42.40 PM

Screenshot 2015-11-11 at 9.42.35 PM   Screenshot 2015-11-11 at 9.42.52 PM   Screenshot 2015-11-11 at 9.42.46 PM

Screenshot 2015-11-11 at 9.42.58 PM     Screenshot 2015-11-11 at 9.43.16 PM

And finally, here is how our cheese tortellini and pappardelle pasta came out.

Screenshot 2015-11-11 at 9.43.26 PM     Screenshot 2015-11-11 at 9.43.32 PM

Summary:

After taking this class, I feel more accomplished as a chef and I’m 100% sure I will be saying good bye to packaged pasta. The individual attention I received as the only attendee was very admirable as I got to participate so much, kind of like a private solo class, which is usually $300 at sur la table but I only paid $70 for the class.  I learned a lot as do I every time I come to Sur la table for a class, even if their are many other attendees I am working with, Sur la table always provides customer satisfaction and makes sure everybody gets in on the fun.

What really stood out from this over all experience was that I really now do feel confident with the skill of pasta making. If you have read some of my other posts or viewed my recipes, you can see I’m obviously more a baker and desert maker, so learning some savory cuisine was a big step for me.

If you have not already, scroll down after reading this post or go on the ‘personnel experiences” menu and view my other experience at a Halloween baking class I took at Sur la table  in case you are further interested on there cooking classes.

Now only if I could convince my parents to buy me a pasta roller set….


Residential Chef Amber Lancaster: 

I just can’t stop acknowledging this amazing person, If you have read my Halloween cooking class post that she even taught, you know what I mean. Amber is a inspiration to all chefs and she is so kind hearten. She bought me a cooking class, taught me so many new skills, and inspires to come back to sur la table more than usual. She always makes sure everybody has fun and she’s more than a amazing chef instructor; she’s a friend. I don’t know one person that wouldn’t get along with her and I want to take this paragraph to thank her so much for what she has done for me. I hope to see her in two weeks for a Thai cooking class she signed me and my mom up for. Thanks Amber, it means a a lot, keep doing what your doing, your good at it 🙂 She deserves all the credit and I think the Sur la table corporation should acknowledge her more often for her hard work and service.

Screenshot 2015-10-26 at 11.04.12 PM     Screenshot 2015-10-31 at 8.39.02 PM    Screenshot 2015-11-11 at 9.43.38 PM


New recipes coming out this week and next week, thanks for reading!

P.S. remember to follow this link and check out some amazing classes Sur la table offers in stores near you!                    http://www.surlatable.com/category/cat2211278/Find+a+Cooking+Class?_requestid=1155985


– Chef/author Zubair


Kitchen aid stand mixers; are they really worth it?

Every cooks dream appliance
If your a cook, like me, most likely this will be sitting on your counter

Now some of you know what this beautiful piece of contraption is and others are thinking ‘what the damn am I looking at”, but I’m sure most of you know what a stand mixer is especially if your a passionate cook.

Stand mixers are made to assist consumers and cooks for they are able to mix large quantities of batter, knead dough, whip egg whites, and much more. Pretty much like a third hand in the kitchen.

Many companies have produced stand mixers such as Cuisinart, Breville, Vonchef, Europrep, Hamilton beach, etc. But what is it about Kitchen-aid stand mixers that’s so popular? Why so praised? Why often bought? Obviously there needs to be something special about it besides its 200$ plus price.

Screenshot 2015-11-09 at 7.50.39 AM

Story Time!

Once upon a time, I really badly wanted a Kitchen-aid stand mixer. So I asked my dad if I could buy one since I’m constantly baking something. We came to a agreement and decided to purchase a Kitchen-aid mixer.

Now ,you have to know that Kitchen-aid has 4 different modeled stand mixers: Classic, Artisan, professional 5 plus, and professional 600. There are like 6 million other kinds, but those 4 mentioned are the most popular. The pictures below show the mixers in order of list (first picture is a Kitchen-aid classic(black), second artisan(red), third picture 5 plus (red), fourth picture professional 600 stand mixer(yellow))

Screenshot 2015-11-09 at 7.57.04 AM                   Screenshot 2015-11-09 at 7.58.54 AM

Screenshot 2015-11-10 at 2.48.38 PM               Screenshot 2015-11-09 at 7.59.49 AM


continuing with story, My dad of course went for the cheapest option, a kitchen-aid classic. I was happy at first because I was getting a stand mixer, the classic was’t too different then the artisan, and because we found a good deal to get a new black kitchenaid classic for $199 considering most classic mixers are $250. Amazon gave us a great deal.

Screenshot 2015-11-06 at 10.04.25 AM

Skipping ahead and reminding myself this is a reviews and opinions page, not personnel experiences, I got my mixer. Behold, that’s how it looks un-boxed, amazing and awesome. Now lets talk about some pros and cons.

Screenshot 2015-11-06 at 10.04.45 AM      Screenshot 2015-11-06 at 10.04.52 AM

Obviously the mixer looks amazing and if you purchase any stand mixer in your life, they all will come with three attachments: dough hook, flat beater, wire whisk.

Pros:

  • The classic mixer is well capable of mixing together ingredients for cake batters, cookies etc
  • Whisk attachment properly beats air into mixture while whipping
  • 4.5 quart bowl allows making large quantities
  • Easy to clean and dishwasher safe bowl and parts
  • easy to operate and lock/adjust bowl into place

Note all these pros even apply to a kitchen aid artisan in case you were planning to buy one, with the exception that the artisan bowl is 5 quart and can yield more. Cons do no not apply to the artisan.

Cons:

  • Classic model bowl comes without handle
  • Mixer shakes and heats up quickly when making bread dough
  • 25o watt motor is not capable of dense mixtures
  • Struggles to make bread dough, sugar cookie cough, etc

If your more into making cakes or anything besides making bread, definitely go for the Kitchen-aid classic mixer, its not too expensive and it makes a great appliance for any cook. Even though the mixer on me I must admit it’s a very good machine and will last you a very long time, unless that is you are constantly making bread, which brings me to my next piece.

Bread I made using my kitchenaid mixer

Kitchen-aid’s can get really expensive but it’s not worth paying for one that can’t knead dough, though this is a problem many stand mixers face. After making bread once in my mixer, the top began shaking even when I had locked it in place and the machine got so hot I almost got heat stroke!

If you plan on making bread this is not your mixer. Instead I would recommend buying a artisan stand mixer. The artisan mixer comes with a bigger bowl with a very comfortable handle, powerful 325 watt motor that can knead bread more easier, comes with a pouring chute that allows to swiftly add ingredients while mixers on, bigger machine in general. Also, you can get it in more than 20 colors! a classic stand mixer only comes in black or white…

Screenshot 2015-11-09 at 7.58.54 AM   Screenshot 2015-11-06 at 10.02.54 AM  Screenshot 2015-11-06 at 10.03.06 AM

The artisan could cost you up to $350 dollars if you are buying from kitchen aid website or store and could cost the same if purchased from Walmart, sears or Target.

That’s why I recommend buying it from amazon for $270 dollars or at Sur la table for $350 but by using a 20% coupon they provide to every customer online and in stores, plus if you buy an Artisan from Sur la table, they add in a free food grinder attachment to go with it, now that’s a good deal!

The only time I would recommend buying one of those heavy duty professional stand mixers (such as the professional 5 plus or professional 600), is if you are use to making large quantities and are constantly baking or starting a bakery.

Currently I have ordered a professional 600 kitchen-aid mixer and it has yet to arrive, but this is a picture of the package that was sent to me. Usually a Kitchen-aid professional 600 would cost $450 … even on Amazon or Walmart! But I was able to get a split deal for a new one for only $60!

Screenshot 2015-11-06 at 9.59.11 AM

Up close, a Kitchen-aid professional 600 looks as so. Note that the handle with black tip is used to raise bowl into place since the mixer is a bowl lift model vs. the Kitchen-aid classic and artisan styles that are tilt head.

Screenshot 2015-11-06 at 10.05.20 AM

Answering our big question, is a Kitchen-aid mixer really worth it?

I’ll make it simple since I had been looking for an answer for that question 3 months ago when I was purchasing my first mixer.

If your only going to bake once a week or not too often, it wouldn’t be a good idea to pay so much for any stand mixer regardless of company or brand.

Stand mixers are very useful and advised if your constantly cooking. If you do end up planning to buy one, get a Kitchen-aid stand mixer. 

There’s a reason Kitchen-aid stand mixers are bought more than any other stand mixer brand and are very popular. These mixers are great quality and are made of pure metal and are sure to last you a long time.

Besides Kitchen-aid’s great quality in mixers, they look very attractive on a counter and really do help with kitchen needs and are far more majestic compared to other mixers.

So the Answer to the question is: Yes, a kitchen-aid stand mixer is worth it. With the exception of being a inactive chef or rarely cooking, then it’s not worth the money, These things are pricey! Also if you do end up deciding to buy one of the 4 mixers I discussed above, I highly recommend the artisan or professional 600 models, they are strong and even able to knead dough compared to the professional 5 plus or especially classic model.

Last thing, If you think you cook every now and then and really think you want a great stand mixer that’s nice and cheap but still gets the job done nicely, I highly recommend buying a Hamilton Beach stand mixer. It’s small, nifty, can accomplish many stuff the Kitchen-aid can, an average of only $80, mixes properly, and comes with many key features that will make this mixer last you a good 10  years.  Below are pics of the Hamilton Beach.

Screenshot 2015-11-09 at 7.56.14 PM    Screenshot 2015-11-09 at 8.25.15 PM   Screenshot 2015-11-06 at 10.07.10 AM


P.S. if you want a detailed review and video demonstrating Kitchen-aid stand mixers along with reviewing other great brand stand mixers, Visit and watch: https://www.youtube.com/watch?v=F5mBOGte5Zo

  1. Kitchen-aid classic: 6 out of 10
  2. Kitchen-aid artisan: 8.5 out of 10
  3. Kitchen-aid professional 5 plus: 8 out of 10
  4. Kitchen-aid professional 600 : 10 out of 10


–  Your chef/Author, Zubair