If you haven’t read my previous Halloween cooking post please go ahead and do so by clicking on the personnel experiences category or go to https://bakedtothebone.wordpress.com/category/personnel-experiences/
anyways moving back to topic, this recipe is a very special one thats not only decorative and festive for the holidays, but it’s also very delicous, take my word for it. I will be sharing the recipe for how to make the sugar cookie dough, homemade frosting, and show how it is decorated or rolled out. One last thing, it was not until late in the recipe that I began taking picture and decided I would make a post on it so… for the first few simple steps on mixing the ingredients and adding them, their will be no picture, but I get you people are smart enough to understand without pictures 🙂
Enjoy and…. boooo (insert ghost emojji)
Sugar cookies
3 sticks softened unsalted butter
2 1/2 cups granulated sugar
4 eggs
1 teaspoon salt
1/2 teaspoon vanilla extract
5 cups all purpose flour
1 1/2 teaspoon baking powder
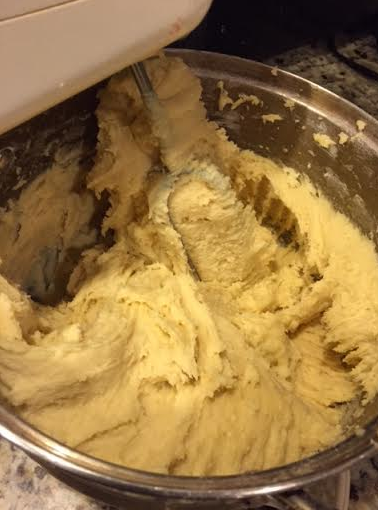
In your stand mixer or in my case since my stand mixer is in for repair, using a hand mixer, cream your sugar and butter together in a bowl for about a minute or until well combined
Next, add in the eggs one at a time mixing thoroughly before adding the next egg. Once all four eggs are mixed in, add in vanilla extract and mix for another minute
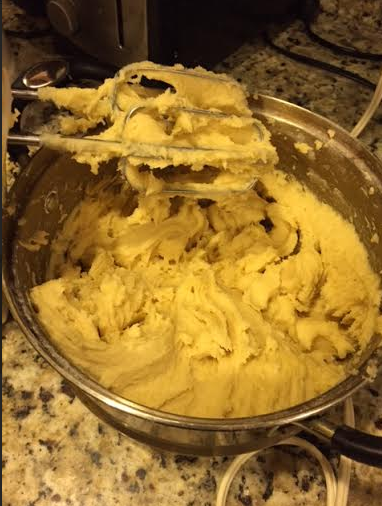
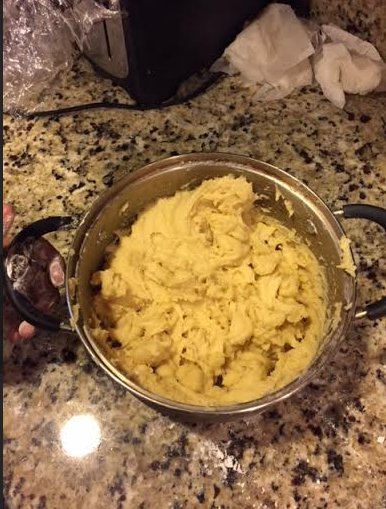
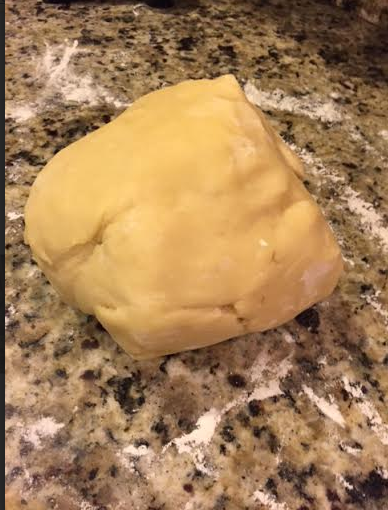
Turn your stand or hand mixer to a very low speed of stir or speed 2 and add in dry ingredients (salt, flour, baking powder), if your speed is too high, you’ll be covered in flying flour! The dough should look like as below once your done following steps/done mixing all ingredients.
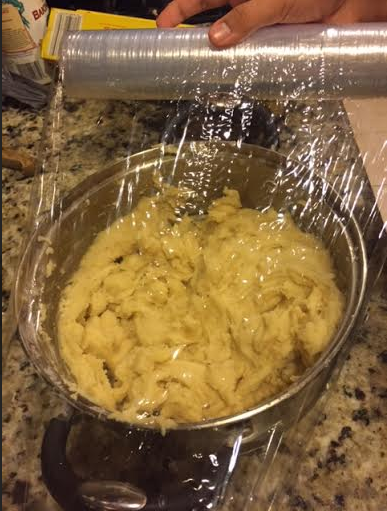
4. Finally cover the top of the bowl with the dough with plastic wrap or cloth, and let them sit in a refrigerator for 45 minutes or overnight so the dough could chill.
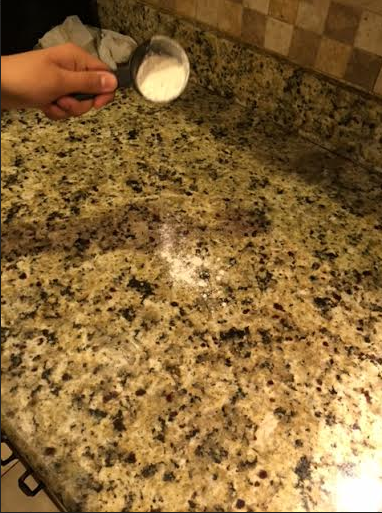
5. After 45 minutes or overnight, remove bowl chilled dough from fridge and remove plastic wrap from top of the bowl. Also remember to lightly flour your work surface before rolling out your dough.
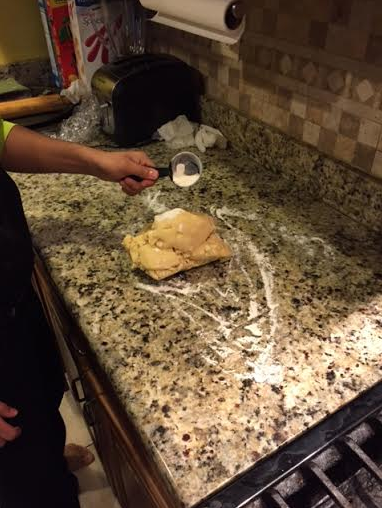
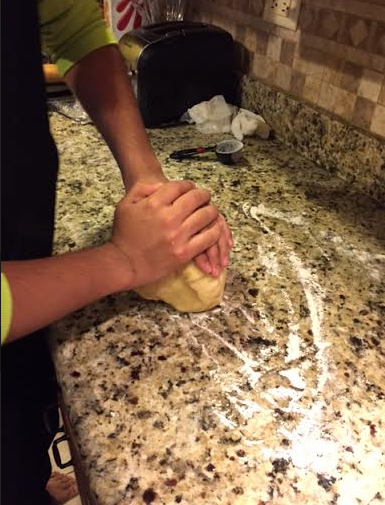
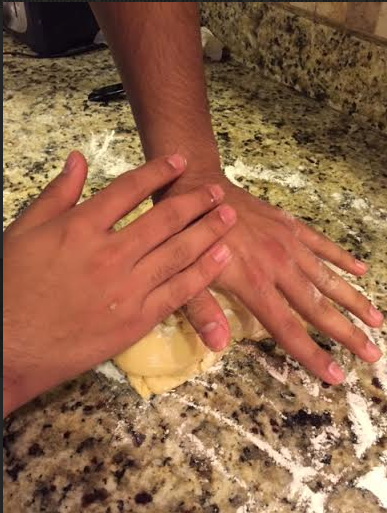
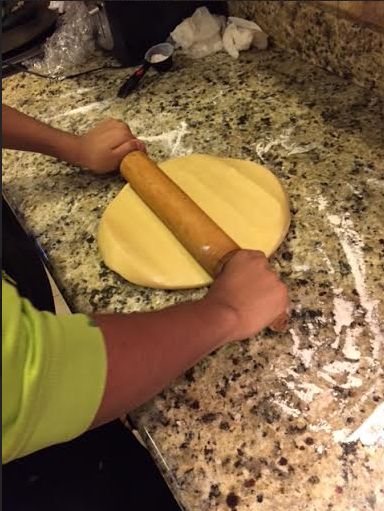
6. Take out the chilled dough from the bowl and onto the floured surface. The dough might be very hard but that is completely normal. That’s why For this next step I recommend (as I did 🙂 to sprinkle some flour on top of your ball of dough and begin to smash and knead the dough with your bare hands occasionally sprinkling more flour on top so your dough is not sticky, trust me its a pain in the *** when you begin to cut out the dough into circles.
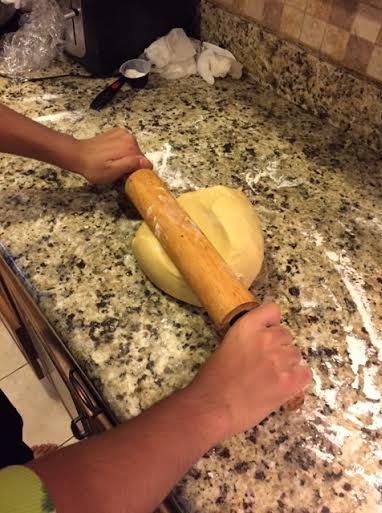
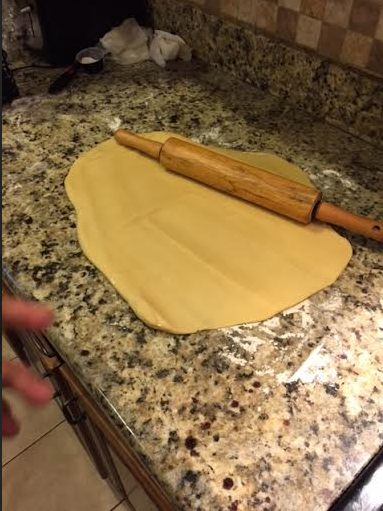
7. Using a rolling pin. begin to roll out your dough. Remember to add a little bit more flour onto your dough while rolling. Also, I recommend as a tip that will make your cookies better, I personally like to dust my dough with sugar and roll it out.
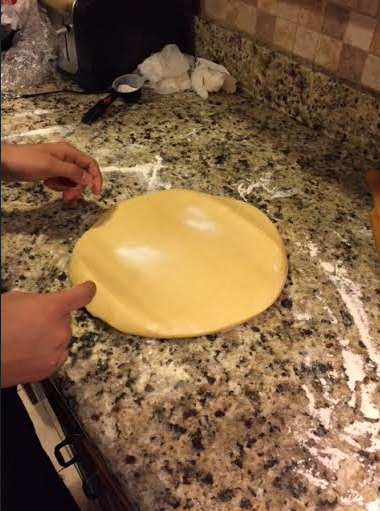
8. Make sure to roll your dough outwards from every side so the dough is even, remember not to roll the dough out too thin or else your cookie will be like a cracker! Before cutting cookie into shapes, preheat oven to 350 degrees.
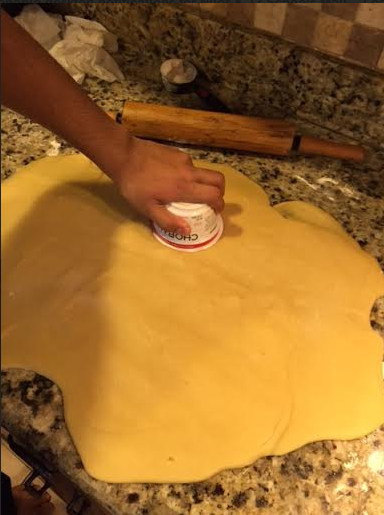
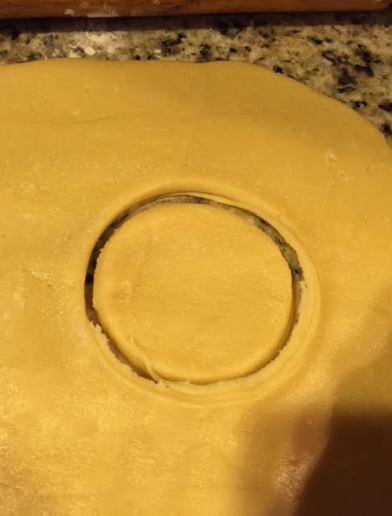
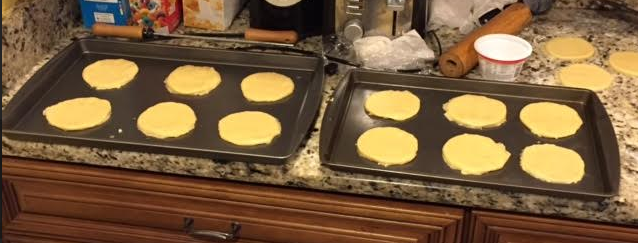
9. Finally cut dough into shapes of circles using a cookie cutter or round object and load onto greased cookie sheet/tray.
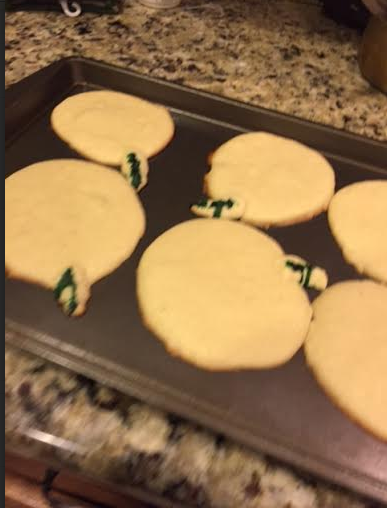
As for the green tips of a pumpkin, they are simple to make, just take any left over dough you have, and shape it into a nugget or rectangle and add a drop of green food coloring to it to make it green, and then simply attach it onto your round cookie shapes.
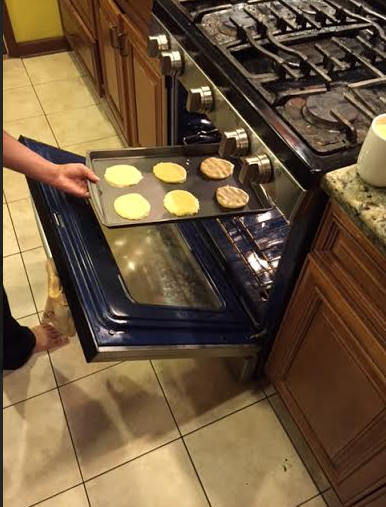
10. Finally place cookies into preheated oven for 7 minutes or until the cookie is brown around its edges.
cookie should be brown around edges , note both pictures to the right of the first picture are the cookies after they came out of oven
Now that our cookies are baked and out of the oven, let them cool and sit, Now here is the recipe for homemade orange frosting that you should be preparing while cookies cool
Orange frosting:
2 cups confectioners sugar
1/2 stick of softened unsalted butter
1 1/2 tablespoon milk
1/2 teaspoon vanilla
1 tablespoon orange food coloring
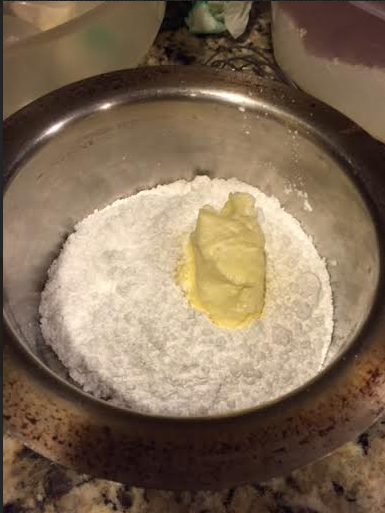
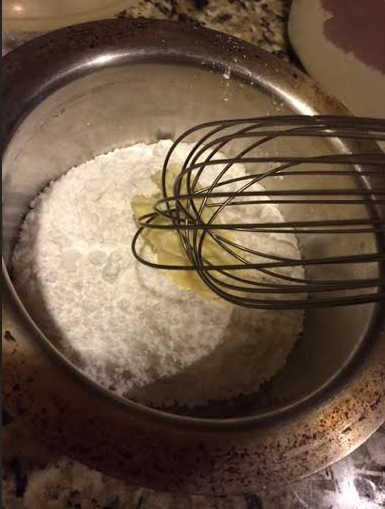
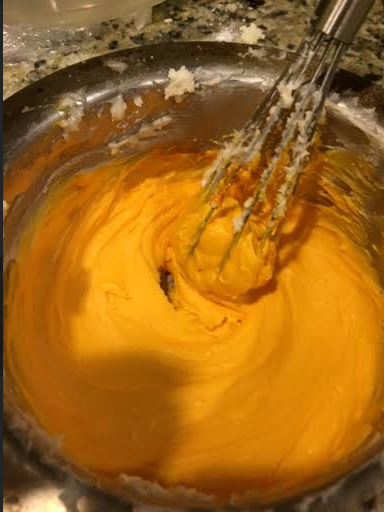
1. In a bowl, add confectioners sugar and butter and begin to mix by hand using balloon whisk
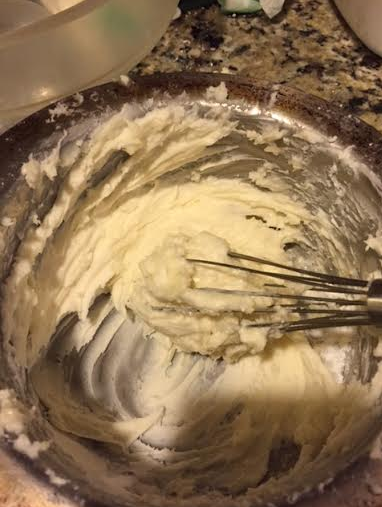
2. While mixing add milk and vanilla extract and continue mixing until mixture forms into frosting
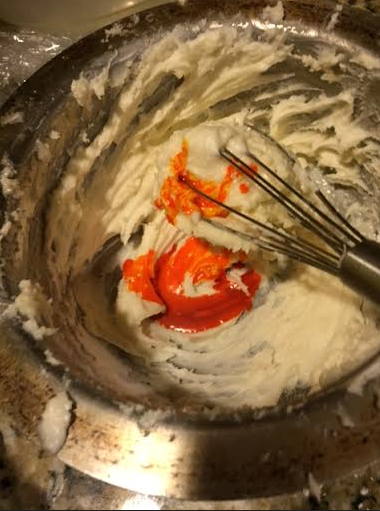
3. Finally add 1 tablespoon of orange food coloring and beat until frosting is perfectly incorporated with color
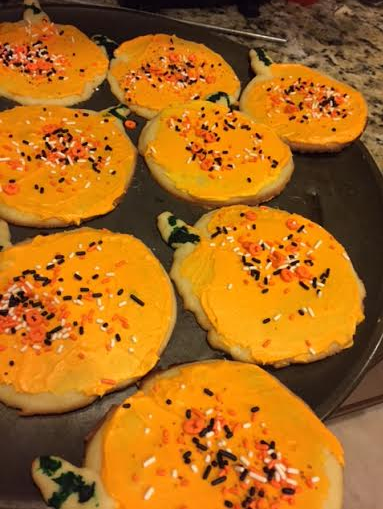
Now that we have our amazing looking homeade frosting made, it’s time to decorate our cookies to further more look like pumpkins
For decorating:
1 recipe sugar cookies
1 recipe orange frosting
Package of Halloween themed sprinkles
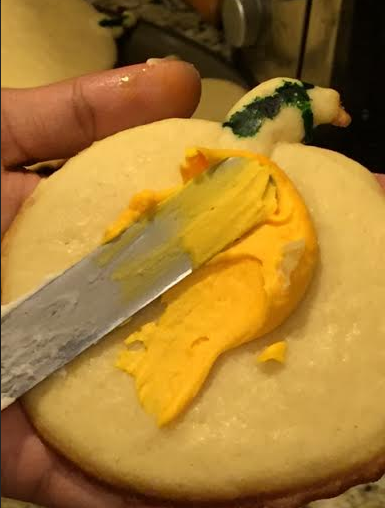
Using your outlet spatula, grab a nice sized glob of frosting and begin to spread it across the pumpkin shaped cookie
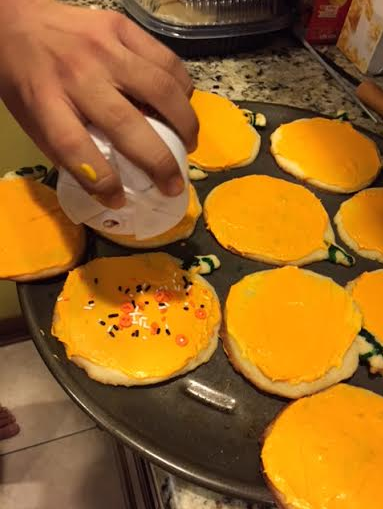
Once you at least get done frosting half of your cookies (about 12 cookies), place them on any tray or plate. Next, begin to sprinkle Halloween themed sprinkles on top of cookies.
Once the cookies are decorated and sprinkled, place them in a refrigerator for 10 minutes so the frosting isn’t wet and so that it can cool onto the cookie properly with the sprinkles.
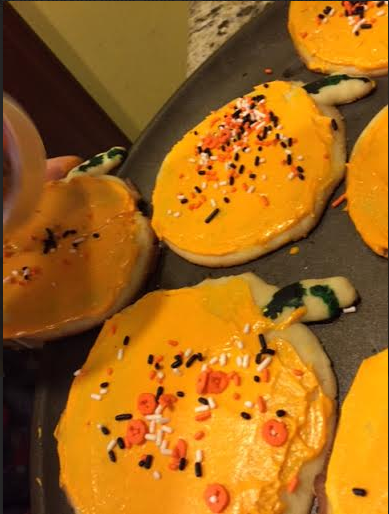
Lastly, after 10 minutes take your delicious pumpkin looking cookies out of the fridge and enjoy or serve to guests at Halloween party.
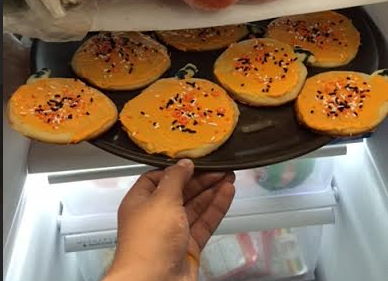
Your pumpkin decorated cookies should look similar to this after out of fridge and all steps followed, enjoy!
Summary:
Well there you guys have it, a perfect recipe for any form of celebration. even if it isn’t Halloween you can still use the awesome sugar cookie recipe and shape them out for any occasion, doesn’t have to be pumpkins! 🙂 same goes with the frosting recipe, if for another occasion just skip orange food color and boom… their it is frosting and normal sugar cookies.
Thanks for reading and if you get a chance comment and give me some feedback. You can always contact me at zubairmuhammad827@gmail.com . Happy Halloween and scariest of wishes to all.
Anyways, today I thought the best way to kick off and celebrate Halloween the best way, is none other than taking a Halloween treat making class! This is my first personnel experiences post so work with me people.
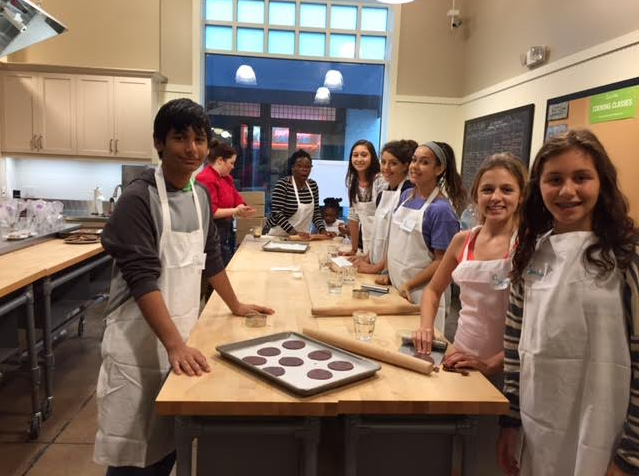
Above is the picture of me and all the fellow class attendees that also signed up for the class. See that whole class there? Do you also see that only one boy standing their in a whole class of girls? Yup that was me, said who cooking is only for females…
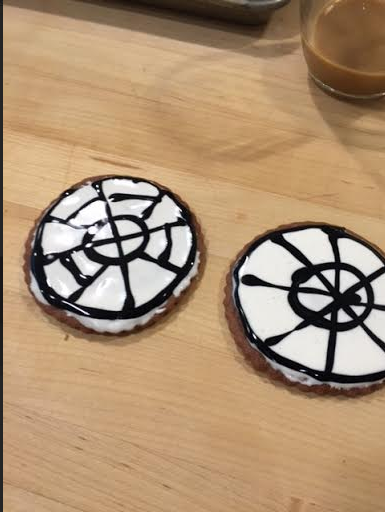
Moving on, class was tons of fun and we made spider web decorated cookies, red velvet cupcakes, royal icing, and haunted pumpkin patch whoopie pies. Regardless of being the only boy their, everyone was nice and we all ended up having a lot of fun and working together, The class was held at Sur la table and taught by chef Amber Lancaster.
By the way check this page of my blog out, it’s about Sur la table, the place I take cooking classes, and it goes into details on the store and chefs if anyone is curious, https://bakedtothebone.wordpress.com/category/reviews-and-opinions/
First we started off class by rolling out cookie dough, that’s why everyone else and I were by rolling pins and brown dough, we next initially all went to the counters where their were numerous kitchenaid stand mixers positioned where we would make icing
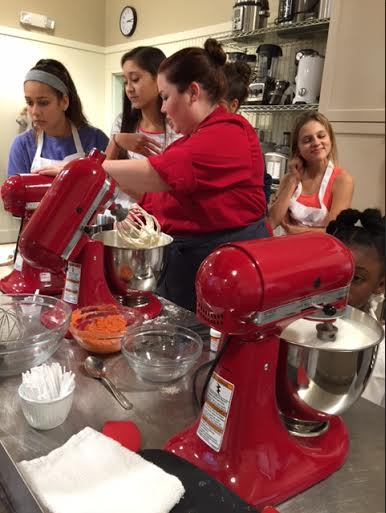
By the way that nice looking lady in red was our chef instructor, Amber Lancaster. every pair of three girls got assigned to working on their own frosting on one of the three mixers. The only reason I was not in the shot was because I was assigned to stove duty, as in boil sugar syrup and work on melting marshmallows while everyone else makes icing 🙂
Skipping ahead, We got done making red velvet cupcakes and we all got to light the marshmallow icing on top of our cupcakes using a torch. That’s me below lighting my frosted cupcakes.
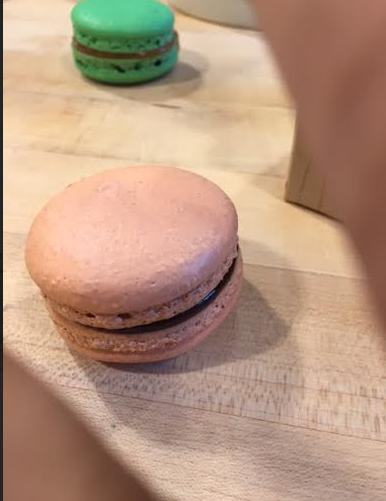
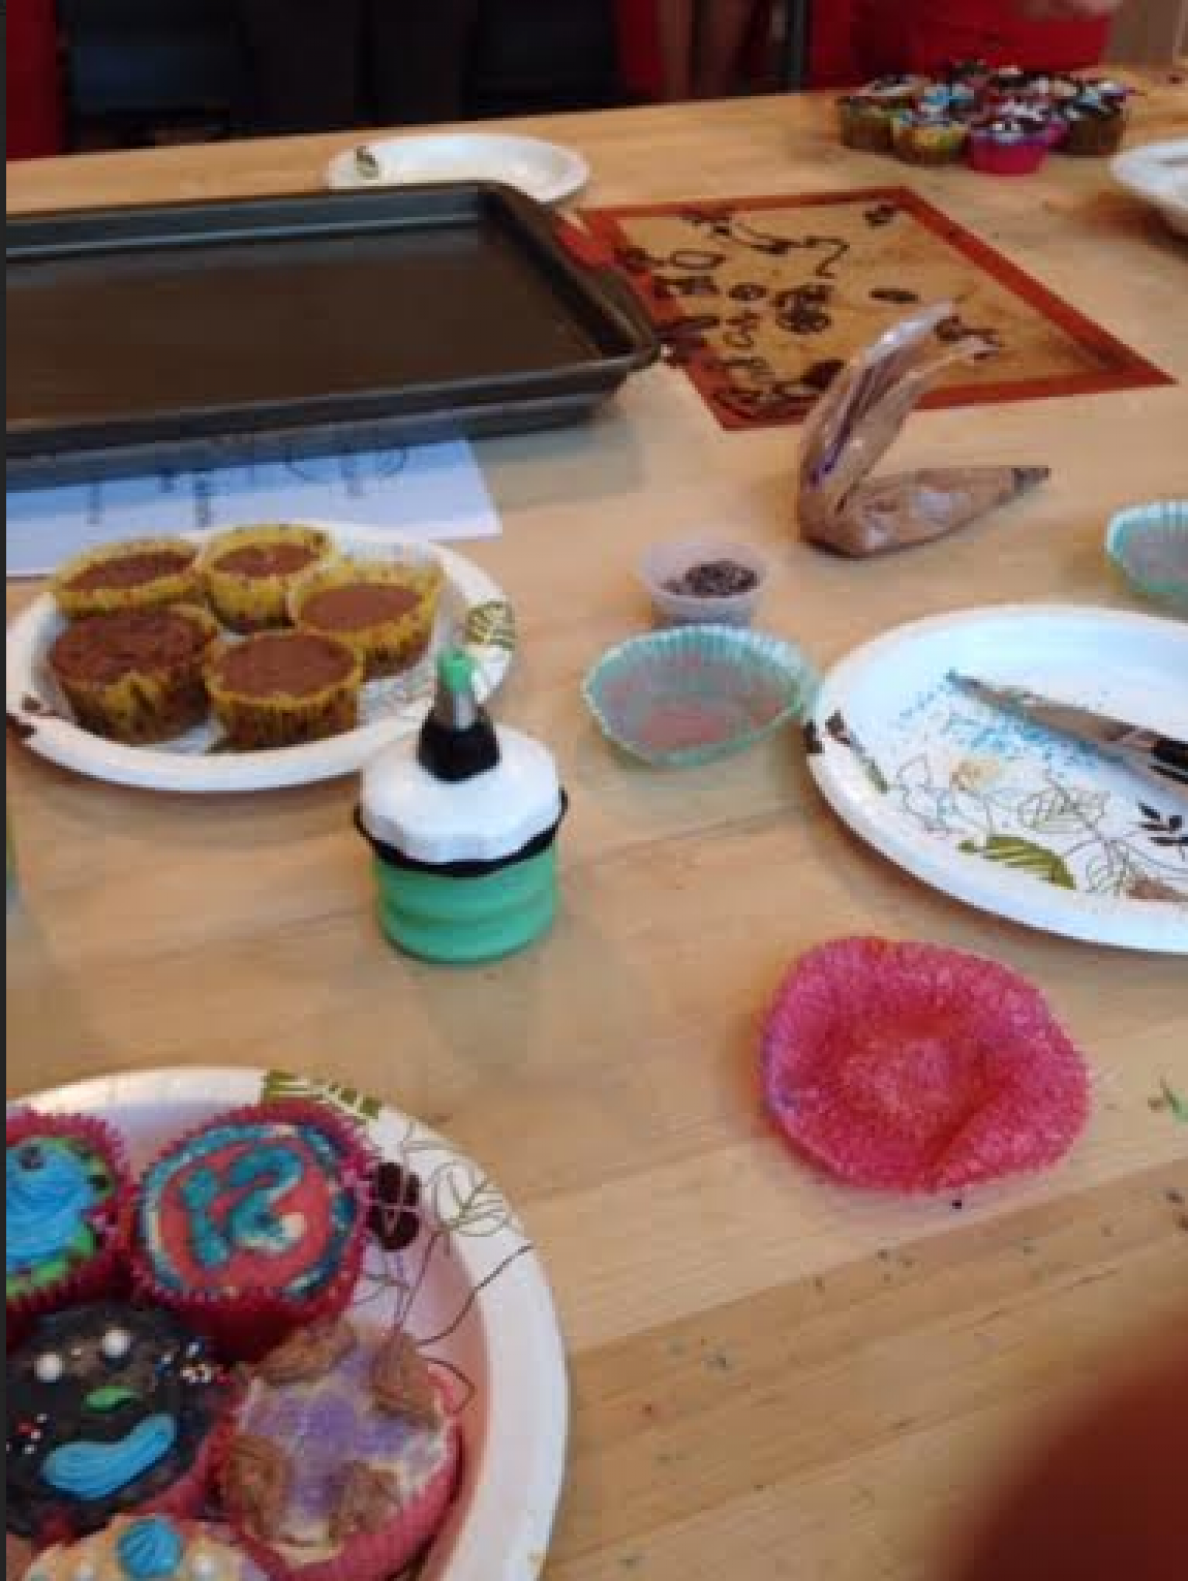
We even made pumpkin whoopie pies, which are similar to small macaron like top and bottom buns/parts, we even piped some orange frosting in between both of the whoopie buns and put it together with a hershey kisses thingy on top making it look like a little pumpkin sandwhich.
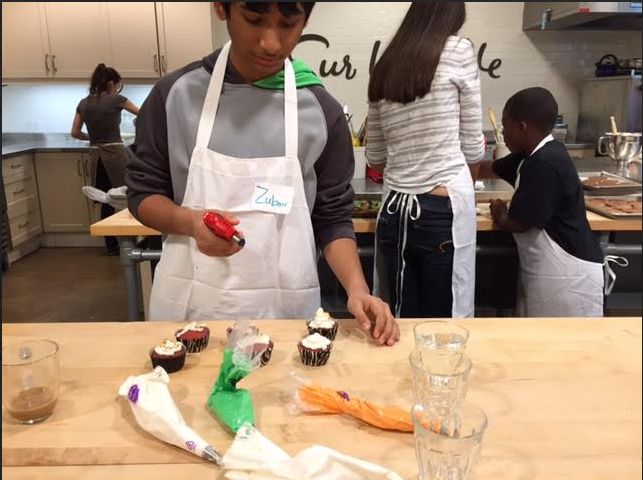
Decorating one of my cookies using a white frosting pen
Summary:
Class was great, very hands on, everybody enjoyed themselves and we ended up wishing each other a happy Halloween at the end of class. All the sweets we made ended up tasting great, check out some of the pictures I took of the stuff I got to bring home from class.
Also….
That’s me and Sur la tables residential chef and todays instructor, Amber Lancaster. I not only took a picture with her for this blog, but also because me and her know each other very well, if you read my previous post in reviews and opinions, she has been my teacher for many other classes I have taken at Sur la table. She’s kind, passionate about what she does, and ensures everybody in class has fun. She had even signed me up for a thai cooking class for free out of her own generosity, but that’s not the main reason why I like her. She’s a good person and you should be thanksful if you ever end up having her as your instructor 🙂
So that was my class, best Halloween ever. Thanks so much for reading this post and I hope one of you nice people comments.
my favorite Sur la table store, Old orchard, Skokie
In this post I will be reviewing Sur la table. This Sur la table in particular that I took a photo of is the one located in Old orchard Skokie. For those of you that do not know about Sur la table, you are in for a treat. Sur la table is a company with many stores spread around the U.S. that sells numerous bake and cookware and are well known for their cooking classes ,which you will constantly find me at. Plus they have the best products ranging from kitchenaid and Cuisinart ,to professional and very kind hearten chef instructors. I will be reviewing both their store and their cooking classes.
The store:
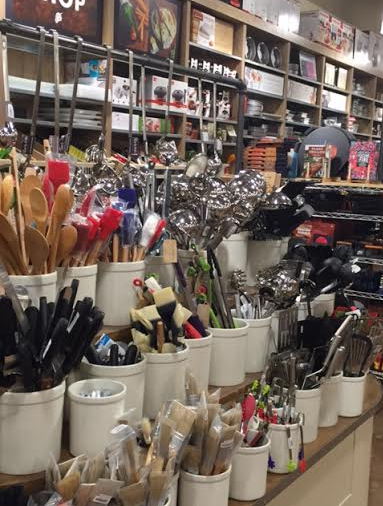
Sur la table may look like a small store from the outside but it is actually pretty big. Through the entrance their is a large store that sells numerous items and in the back there is a door leading to a amazing well geared and equipped kitchen. I will be reviewing the store on 5 pieces , 1. stock and inventory , 2. Prices, 3. quality in product, 4. Staff, and 5. Organization. To start I will post some pictures that I have taken in the store section of Sur la table so you guys get a bit of an idea what we’re dealing with.
So, as you can see above, the store offers a variety of cooking and kitchen utensils… when I first came in here two years ago I wanted to buy everything off the shelves… till I saw the prices.
1.For our first rating piece, Stock and inventory. I personally believe Sur la table has a large inventory of kitchen tools. From balloon whisks and spatulas you can choose to stand mixers neatly sitting on the shelves, this store has it all. I have even came when their have been lots of customers and the store is always freshly stocked and reloaded with new equipment to make sure no shelf goes empty! I give this piece a 10 out of 10!
2. Prices. OK trust me I like Sur la table, they have nice products and all that cooking jazz but… they are way too pricey! if you go in with only a 10 dollar bill I can guarantee you will only be able to get like a small 8 dollar worth garlic peeler or a couple of cookie cutters that are a $1.50 each. Even for a store with good quality, Sur la table kind of pushes it here. did you know a small bottle of vanilla bean paste is $12! You can get a kitchenaid artisan mixer for $270 dollars off of amazon that includes every part in the box but if you buy the same mixer at Sur la table , its $350. But one thing really nice about them is that every month, Sur la table always and I mean always will give customers 20% off deals. Plus they are always having promotions and sales everyday, for example when I was in their one day they were having all day sales where mini food food processors are $30 or they might have 60% off on cutlery and knives all week. Bottom line, they always have sales so that’s much to appreciate plus they are way way better than Williams-Sonoma. Sur la table has the decency to at least constantly have sales and have reasonable prices on some items but Williams-Sonoma on the other hand, they are just way more overpriced than Sur la table and some of the merchandise they give isn’t as good in product or quantity. For example (and this is true and can be proven if you visit both Sur la table. com and Williams-Sonoma.com), it’s $899.95 for a set of 10 all clad Williams-Sonoma self brand pans, while at Sur la table you can get a 13 piece Sur la table branded all clad set of pans for $479.96. I’ll at least give Sur la table a 6 out of 10 on this part.
3.Quality in product. As expensive as they may be, their tools, however, are pure amazing.
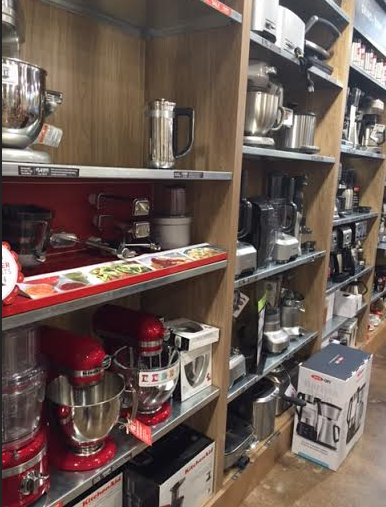
As you can see above, they even sell fine espresso and coffee machines that are great quality, plus the staff always offers a free cup of coffee using one of the machines so customers get an idea how good it is. The pictures for some reason are coming out blurry so excuse me on that. At the top of the page you can even see that they have kitchenaid mixers, which are one of the best quality stand mixers that last for a lifetime as some customers say who have had their stand mixer for more than 10 years! Many companies that Sur la sells and is partners with includes Kitchenaid, Breville, Cuisinart, King Arthur flour, and they sell their own line of well made stainless steel and clad utensils and measuring cups engraved with “Sur la table”. These tools, pans and so on, last a life time and are well capable for balancing heat over stove tops or being the perfect baking dish. I give this piece a 9 out of 10.
4. Staff. Now a lot of the chef instructors are very nice but the staff is a bit different. To be honest a lot of the times I have been in the store their have been many staff members that some I have never seen before so I’m gonna base this on general staff workers excluding chef instructors. A lot of the retail workers and cashiers are very friendly but you have to learn if you are going to shop at Sur la table very often, you have to be rich. and I guess that is sort of a standard they expect from their customers. They were pretty nice to me when I was scoping the area out but I mostly think it was because I had my class apron on so they must have known ‘Oh he’s one of those people who payed’. But some of the workers were nice overall regardless of wealth, while others would try selling expensive goods to you and shun you if you don’t follow through. But no matter what kind of inner person they were, they always provided a lot of information on any product, helped you around in case you needed a specific tool, and always offered a free cup of coffee to promote their new fancy coffee and espresso machines. They even offer in store demos on new grills, toaster ovens and on any new appliance. I give this piece a 7 out of 10.
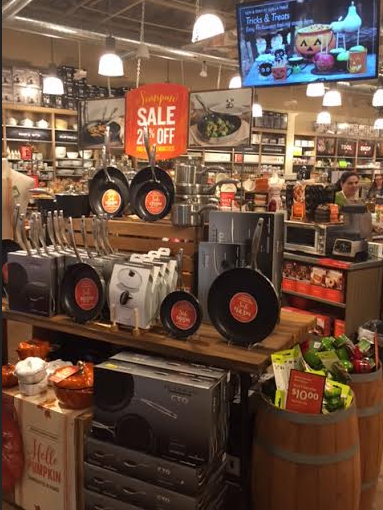
5. Organization. Sur la table is always well organized every time I have been in their. clad and stainless steel pans will be on one display while nonstick will be on the other.
As you can see above, all the nonstick pan were well stocked on one display while all the other kinds of pans were on the other side of the store in display. Also, if you scroll up to my first 4 photos, you will see all food processors and stand mixers were accordingly lines up on the shelves against the walls where most electrical appliances stayed. Even the coffee machine pictures above this one were all lined up neatly in a coffee machine section. I give this piece a 10 out of ten.
The whole overall store gets a 42 out of 50 with all points added, so that’s a B+ . Regardless of any cons, Sur la table has an amazing collection of kitchen tools and even has some basic baking and cooking ingredients on shelf such as pure vanilla bean paste made fresh from Madagascar vanilla beans instead of vanilla extract. I believe everyone even if they don’t like to cook, should have the opportunity to stop by and take a look into this lovely store/company, it has every pot and pan for home cooks and for starting a restaurant or bakery 🙂 , P.S. Sur la tale is not only in IL, The corporate has stores in 18 states and each of these states has a minimum of three Sur la Tables in them.
Lets move on to talking about my favorite Sur la table topic, Their hands on cooking classes.
Cooking classes:
Besides their very unique and well equipped overpriced store, Sur la table is also very gifted with their cooking programs. I’ll try making this summary short don’t worry… try. I first discovered about their cooking classes when I was looking up numerous cooking day camps for teens. Every summer Sur la table has this program for teens and kids where from the beginning of June to the end of August, you can sign up for a five day course.
You can choose from taking a five day course that either focuses on baking and universal deserts, or you could take a savory and science in the kitchen course. Each course is a staggering $250. I thought it was way too much money but trust me, once you have taken a camp session you will see it’s all worth it.
Anyways, each camp is 2 hours a day for 5 days where each day you make 4 different dishes and work in groups of three to four, everyone still gets a opportunity. Or if you are a adult, everyday, not just summer, Sur la table has one day cooking classes for adults and sometimes kids where usually for one day where you cook for up to 2 and 1/2 hours and it’s $70 dollars but well worth it, they even give you a 10% off coupon at the end of class for in store purchases.
I won’t rate the classes like I did for the store, no point counting 🙂 below are pictures of the fantastic kitchen Sur la Table holds their cooking class in.
Since 5 day courses are only in summer, I still strongly recommend one day classes because they may be expensive but well spent. Plus any class you take is tons of fun!
Usually when stepping in, the kitchen tables (The wooden one above is an example) usually are neatly prepared with recipe packets of what you will be cooking that day along with a chopping board and a professional Wushtof knife if you are chopping any vegetables for the class.
You usually are paired with either 3 or 4 people but the chef leading the class will make sure everything goes just fine. During class you create all four recipes while doing each step at a time. Usually the chef will give you a demonstration before you start and they will usually give out tips, tricks, and teach you something new.
Talking about chef instructors, this Sur la table specifically has up to 7 chefs, I have only had three of them as chef instructors of the classes I have taken, while some other of the chefs I have met. Every chef their is especially nice, gives tips to making the recipe, and are very passionate about their job, which, I find a very good quality. I would especially like to reference two of the most nicest chefs , Residential Chef Amber Lancaster and Chef Beth Welch.
Beth was my first ever chef teacher at the first Sur la table class I ever took and she is really nice and very professional at what she does, if you sign up for a class and she is the instructor for the day, your in for some luck. Also make sure to, if you get a chance, check our her new shop Beth’s little bake shop down in Evanston.
Shortly after I took a break from taking classes, Beth opened her own bakery and rarely taught any of the classes or camps anymore. That’s why when I signed up for a sweet treats making 5 day class, Amber was my teacher. Amber might have been different than Beth but that didn’t stop her from being just as good. Not only is she the Residential and head chef of the Sur la table down at Old orchard, but she is very generous and has a big heart. She gave me a cake decorating nozzle set for free and even signed me and my mom up for a Authentic thai cooking class she will be teaching. Not only that, she even offered good deals to all the other class attendees as well and always made sure everything was perfect. She’s a real gift if you get to meet her 🙂
Back on topic, The kitchen for the cooking classes as I showed above, is always well equipped with the finest kitchen appliances that are up to date just for class uses.
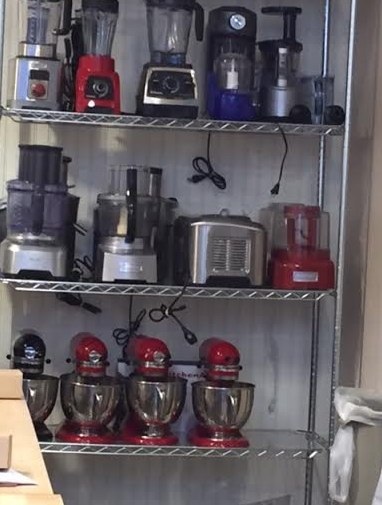
They have a whole shelf in the kitchen just with numerous food processors, artisan stand mixers and much more advance and modern appliances
Lastly, in every class the chef will always make sure everyone is having equal amounts of fun as well as an opportunity. For example, in most classes, The chef will call up three volunteers to work on the stove to make chocolate ganache or for whatever recipe for that day requires a stove top. During this time, other students could either watch the other student at the stove-top and take notes on any advise the instructor gives, or they can head back to the wood work table to get started on the next recipe.
Also… You don’t even have to clean any dish or utensil you use! They take care of it all. I give their cooking classes an A+ for good efforts, passionate chef instructors, and a hell of a good time while cooking 🙂
The summary:
Apologies if this was too long, I just can’t stress enough about what a good store this is. For anyone curious of how many classes I have taken before or what kind of classes such as pasta making, stay tuned for the personnel experiences menu, I will post something on their at Saturday.
Overall Sur la table is a great store for finding any cooking tool you need and it’s one of those stores that always have something new to look at every day. As for their classes, beyond great!. With fine chef instructors who really make sure you understand every recipe, and professional machinery you get to use in class and meet new and hopefully nice people who are their as the same reason you are : to cook.
Next post will be this friday on a Halloween treat making class I will be attending at Sur la table this Saturday on Halloween. Thanks for reading. Make sure to check out the website below, lots of great stuff!
These are Pictures from a French macaron making class I recently took with my first ever chef instructor that I had a while ago, Beth Welch. By the way I’m that guy with the blue sweater, and Beth is the one standing next to me.
Yes it’s finally here… my first recipe post. I thought it would be a good kick off to give a recipe that I personally don’t know who doesn’t like, Fudge brownies.
These brownies are both delicious and very chocolaty, plus they are fun to make. What’s a little different about these brownies are that they don’t require you to melt unsweetened chocolate and add it to the mix or stir in cocoa powder into wet ingredients. None of that Jazz.
The brownies
These brownies actually require steps to be followed through using a old fashioned double boiler.
Before I begin note that I had actually first gotten the idea and recipe from a different website. If you want to see the original recipe for reference please click the link, http://www.inspiredtaste.net/24412/cocoa-brownies-recipe/ . The only concern from the wonderful recipe I got from inspired taste was that the batter they gave the recipe for wasn’t enough to fill the pan and in my opinion, some of the measurements needed to be changed. That is why I decided to change some of the measurements, add a ingredient, and innovate the recipe using new measurements.
Pictures will be provided with each step to insure full understanding, Enjoy.
Fudge Brownies
3/4 cup cocoa powder (can be substituted with 1 cup chocolate chips)
3/4 cup of all purpose flour
2 cups granulated sugar
1 stick of unsalted butter
1/2 teaspoon salt
3 eggs
1/4 teaspoon vanilla extract
2 tablespoons regular milk
about half a cup M&Ms (optional)
Start off by filling the bottom double boiler pan more than half way with water (make sure it isn’t enough to touch the bottom of the pan on top) and place over medium heat to heat.
2. While your water is being heat up, in the second boiler pan (the one that goes on top) combine butter, sugar, salt, and cocoa powder and mix with either a wooden spoon or rubber spatula.
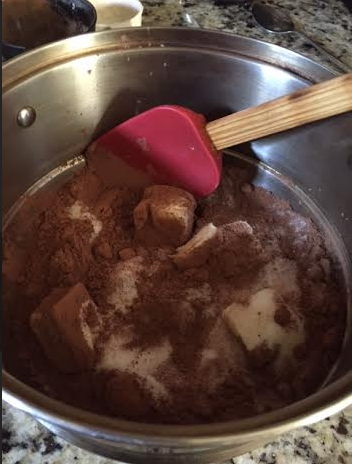
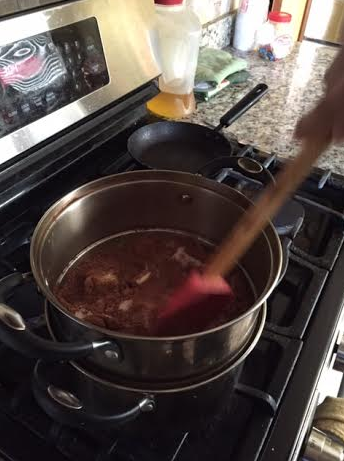
3. Wait for a minute or two until your boiling water beings to bubble, slightly sizzle, or boil. Once it reaches this state, place the bowl with the ingredients (flour,sugar,salt,butter, and cocoa) on top of the boiling pan and using your spatula or wooden spoon, begin to gently mix the ingredients.
stir ingredients while bowl is resting on top of pan with boiling water
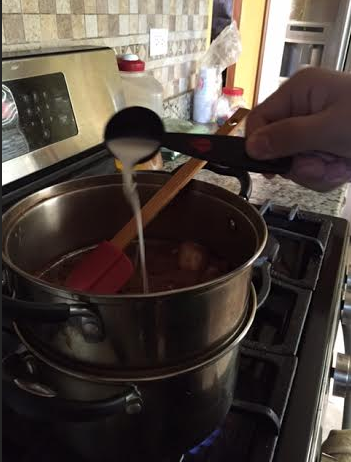
4. As you mix you might begin to notice some chocolate melt or some fudge develop, this is normal and is because of the melting butter. Next add in your milk and again stir, the milk helps the butter turn some of the cocoa powder into fudge as does melting butter.
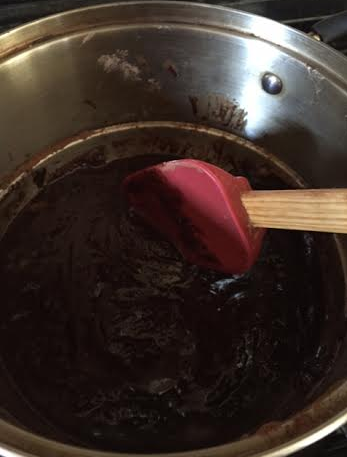
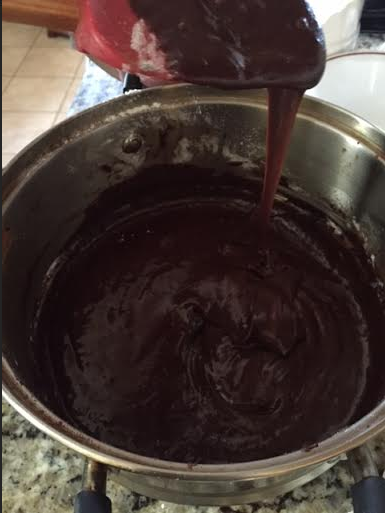
5. Continue to gently stir your mixture over the heating water for about 3 to 5 minutes or until your batter begins to look gritty or thick and into fudge. It’s okay to turn the heat up on the stove if you feel the melting butter process is taking too long. After 3-5 minutes your batter should look oozy or thick, that’s a sign its ready.
It should look like this after a little while
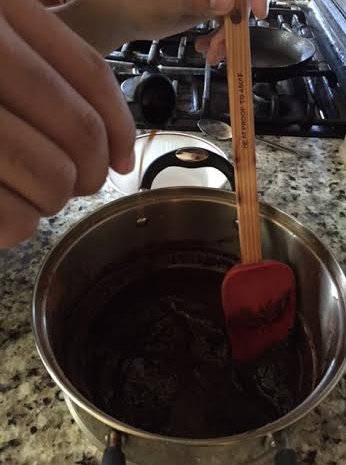
6. Once the batter looks as so (pic above), turn off the stove and take the bowl of fudge out off of the second pan and place it on a counter and allow it to cool for 5 minutes so the mixture is warm and not too hot. While it is cooling off, preheat your oven to 350 degrees.
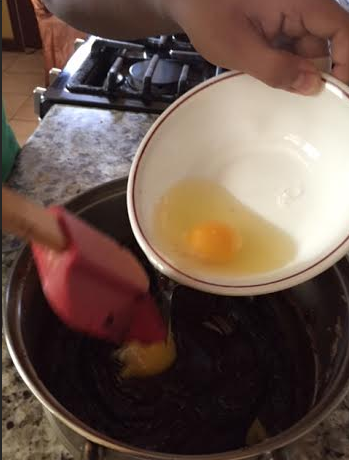
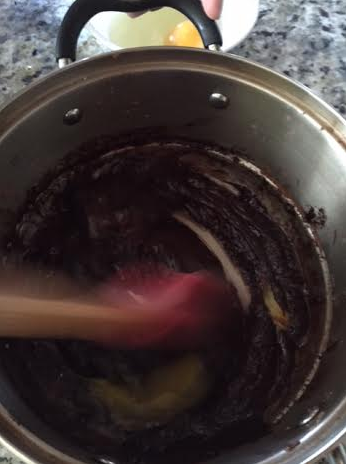
7. Once cooled off for 5 minutes, add in your vanilla extract and 1 egg at a time and stir. Once one egg yolk is incorporated with the vanilla, add in second eggs and stir and repeat with last egg.
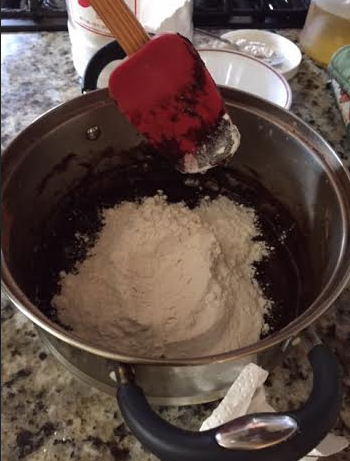
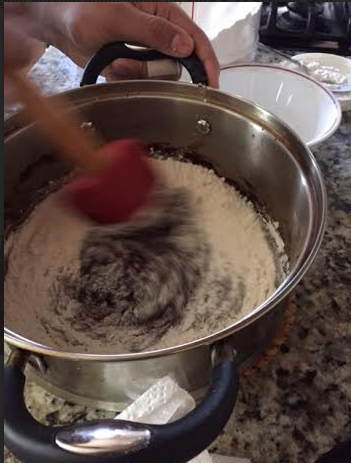
8. Lastly, add in the flour and stir for a good 2 minutes or until the flour is well mixed. Remember to scrape the sides of the pan to make sure all flour is incorporated, that’s why a rubber spatula is best used for the job. Your batter should have a nice and thick consistency.
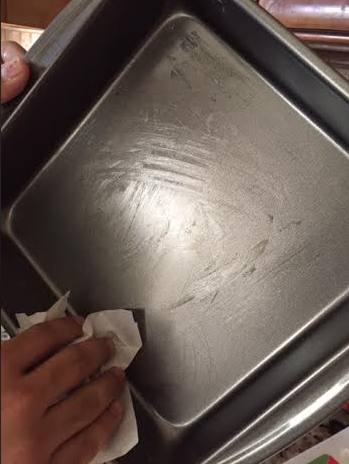
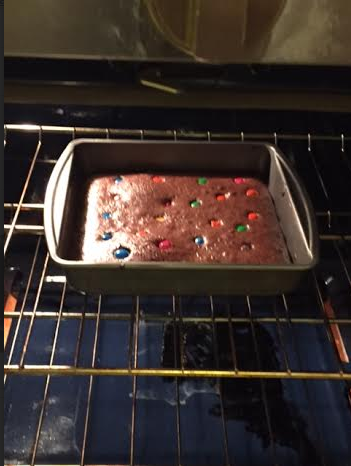
9. Using greasing spray or a butter wrapper, grease a 8 by 8 inch or 9 by 9 inch square cake pan. Add in your batter into the pan and using your trustee spatula, spread the mixture to each corner of the pan so it’s even. I even recommend as tip my cooking teacher taught me, when you get done spreading, grab your pan and smash the bottom of it on your counter numerous times so the pressure will cause the batter to spread all around.
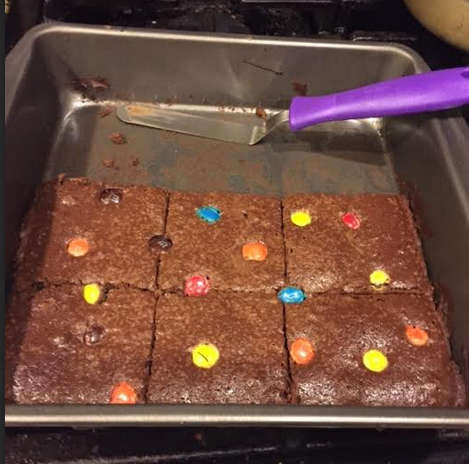
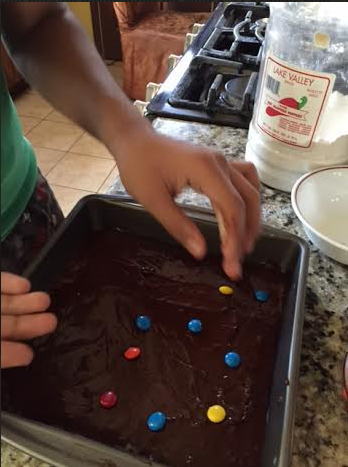
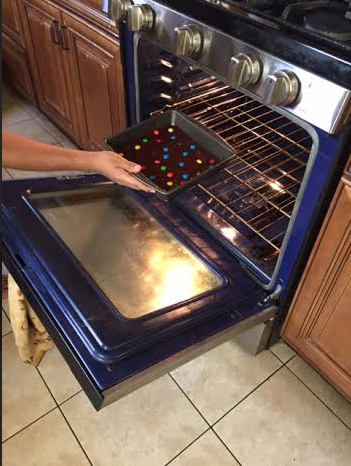
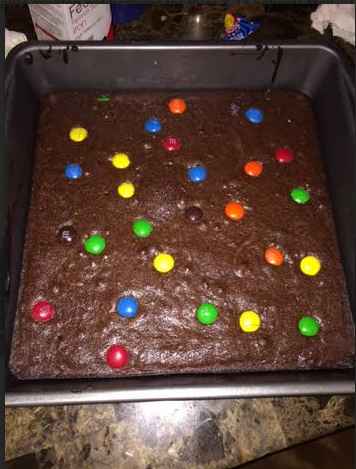
10. This next step is optional but, I usually like tossing some M&Ms on top of the prepared batter to make it look eye catching. Place your pan with the batter into your preheated oven for 20 minutes or until a toothpick can be inserted into the center and come out clean. Let cool and cut into the desired number of squares. (third picture at right side is how brownies look after being taken out of oven).
And ya their it is, delicious fudge brownies. I know some people make something and lie about how good it is and how it’s the best of that dish you will ever encounter. I will in the future try ignoring to do that but what can I say, these brownies are really good, everyone would want seconds! When I especially made them and brought them to school to raise money for a club, I was sold out by the middle of the day and I’m not even exaggerating that.
As for some of you people who look closely, yes the picture at the top of the page before I showed the procedure, shows a somewhat different looking batch of brownies. You have to keep in mind I made this recipe more than 5 times so… it’s still the same recipe just a different batch.
Hello dear readers! I am your author and chef ,Zubair. Welcome to Baked to the Bone!. Before you read this post I recommend you click that menu option at the top of the page that says “About me” so you get a little bit of background knowledge.
Moving back on topic, This is both a food and personal blog, mostly a food one 🙂 This blog will offer a variety of culinary tips, experiences, and recipes that I will be posting. Most of the time I will be publishing recipes but I will post recommended resources that I recommend for anyone with a interest in cooking. If your more of a baker and a sweets person, like me, this blog will be a safe haven for you since I will mostly be publishing posts that are based on desert making.
As for the categories at the top of the page, the recipes menu will be featuring a variety of recipes and pictures along with the recipe to insure you get to see how the dish is suppose to look after each step and a picture of the completed product.
The reviews and opinion menu will offer opinions on many brands and products that I will discuss as either a ‘fine investment’ or a ‘down pay” of course many of the supplies I will be able to provide a detailed and experienced description on since I will have them already purchased.
Lastly, the personnel experiences page is their to offer you, the readers, a story or two to read that I will occasionally type up about my past experiences with cooking to entertain and even humor you so you can get a bit more knowledge on who’s typing on the other side of the screen. I will even type up some past experiences of mine when I had first began cooking and how I burned, over salted, or messed up on any recipe. That’s right blueberry pie I am talking about you.
To be a great chef it’s always OK to mess up, your learning, though I don’t recommend it, it’s really the passion and determination that makes you a great cook. So sit back and relax and enjoy this site while your on it. New posts made every Wednesdays and Fridays, I’ll make sure to add recommended websites and sources at the end of some of the articles.
If you are a healthy eater or a dieter, leave this website right now or stay to bear it, sugar, calories, deserts, and sweets are key factors! You’ve been warned.


 cookie should be brown around edges , note both pictures to the right of the first picture are the cookies after they came out of oven