Pancakes

I decided that it’s been a while since I last made a recipe video on my blog or any video! The last time I made a recipe based post it was reviewing the kitchenaid professional 5 plus I recently got and the apple bread pudding video post.

I realized I was getting much more views on my video posts… no seriously almost everyday most of the views my blog would show me were on my video posts. So here is a new one.

We all love pancakes! I prefer mines with blueberries but some people go with chocolate chips or just plain ol pancakes. Here’s my take on making them.

You can either click the video on top of the page (make sure to keep the volume up, I put interesting music in there)  and spare yourself the reading or here is a written version of the recipe for you readers out there.

Blueberry pancakes:

  • 2 cups all purpose flour
  • 4 tablespoons sugar
  • 1/2 teaspoon salt
  • 1 teaspoon baking powder
  • 1 1/2 cup milk
  • 2 large eggs
  • 2 tablespoons melted unsalted butter
  • 1 cup blueberries
  1. Add dry ingredients (flour,sugar,salt,baking powder) into the bowl of a stand mixer and mix, In a liquid measuring cup, whisk together the milk, eggs, and melted butter and add into the stand mixer bowl. Mix until the batter is smooth and light yellow with a thick consistency. If you don’t have a stand mixer you can always whisk by hand or use a hand mixer. That’s how it should look

2. On a griddle over medium heat, spray with cooking spray or add a tablespoon         of butter. Once the butter has melted, pour in pancake batter using a ladle or          whatever your feel like. Sprinkle 7-8 blueberries on top.

Screenshot 2016-06-13 at 5.41.58 AMScreenshot 2016-06-13 at 5.42.23 AM

3. Cook pancake on medium heat until the edges have bubbled or lift the                       pancake up gently, if the bottom is golden brown, you know it’s time to flip.              Add a tablespoon of butter on top of the cooked side and let melt while                     cooking. Cook until both sides are golden brown.

Screenshot 2016-06-13 at 5.52.38 AM

Enjoy and serve with maple syrup… That’s how mines turned out 🙂

Screenshot 2016-06-13 at 5.56.03 AM

The perfect breakfast right there, plus it’s easy to make! Besides my craving of blueberry pancakes, I decided to make pancakes as my next recipe post because I had a ton of you messaging on my Instagram, (@the_bipolar_kitchen),  to make them as my next recipe post.

Thanks for watching or reading and remember to like this post and send me a message on my Instagram for what I should make next or I’ll just think of something to make. Happy summer!

– chef/Author Zubair M. 


Chocolate Chip cookies

Screenshot 2016-06-07 at 6.19.52 AM

One of my favorite deserts and cookies in the whole world are chocolate chip cookies. This recipe especially incorporates extra chocolate chips into the cookies so every bite is chocolaty.

This recipe also makes your choco chips cookies soft and chewy! I decided that if I’m gonna be baking and cooking a lot, its time I do proper prep and mise en place which is french term for having everything in place.

That’s why I went out and purchased these mini preps bowls so now I can have everything measured out and just add each ingredient into the recipe immediately instead of running around to do it while I’m cooking.

Screenshot 2016-06-07 at 6.15.58 AM  Screenshot 2016-06-07 at 6.16.10 AM

Fancy right? kind of like how chefs on food network have their stuff layed out, enough talking lets make these already!

Chocolate chip cookies:

  • 2 cups flour
  • 1/2 cup sugar
  • 1/2 cup brown sugar
  • 1 cup chocolate chips
  • 1 egg yolk
  • 1 stick unsalted butter
  • 1 teaspoon vanilla extract
  • 1 teaspoon baking soda
  • 1/2 teaspoon salt
  1. Preheat your oven to 350 degrees and line two cookie trays with parchment paper. In a mixer bowl fitted with a paddle attachment, cream softened butter with sugars.

Screenshot 2016-06-07 at 6.16.21 AM Screenshot 2016-06-07 at 6.16.34 AM Screenshot 2016-06-07 at 6.16.45 AM Screenshot 2016-06-07 at 6.16.53 AM

2.Once creamy and smooth, add egg yolk, salt, vanilla, and baking soda.

Screenshot 2016-06-07 at 6.17.01 AM Screenshot 2016-06-07 at 6.17.12 AM Screenshot 2016-06-07 at 6.17.22 AM Screenshot 2016-06-07 at 6.17.32 AM

3. Turn mixer on a low speed and gradually add 1/2 cup of the flour at a time. Stir in one cup of chocolate chips.

Screenshot 2016-06-07 at 6.18.15 AM Screenshot 2016-06-07 at 6.18.37 AM Screenshot 2016-06-07 at 6.18.46 AM

4. Using a ice cream scooper, or as I call my pooper scooper, scoop out medium size balls of the cookie dough onto the trays. You should be able to make 24 cookie dough balls but I made 18 because I can’t handle myself around cookie dough….IT’S SO GOOD!

Screenshot 2016-06-07 at 6.19.04 AM Screenshot 2016-06-07 at 6.19.17 AM Screenshot 2016-06-07 at 6.19.30 AM

Bake at 350 degrees for 13 minutes and enjoy!

Screenshot 2016-06-07 at 6.20.04 AM

P.S. follow me on instagram @the_bipolar_kitchen 

       – Chef/Author Zubair


Tomato soup with Parmesan crisps

Screenshot 2016-04-03 at 7.58.11 PM

To make things up for being gone a long while, here’s a great recipe for tomato soup with Parmesan crisps.

This bowl of soup is restraunt quality and should be made and garnished very professionally, I mean just look at it! The Parmesan crisp is the cracker like thing at the side of the bowl, the white liquid in the center of the bowl is heavy whipping cream and on top I just sliced up some basil into ribbons and garnished the soup.

You can just make the soup with the Parmesan crisp if you want but a great impression comes with the best of work!

I don’t really have pictures for how to cut basil into ribbons but you pile a couple of basil leaves on top of each other, roll them up into a cigar, and slice the cigar into pieces with your chefs knife. Pile, Roll, Slice.

Ingredients:

  • 2 (28 ounce) cans whole plum tomatoes
  • 1/2 cup olive oil
  • 4 cups vegetable broth
  • 1 tablespoon oregano leaves
  • 1 teaspoon fresh rosemary
  • 2 tablespoons tomato paste
  • 2 carrots
  • 1 onion
  • 6 cloves garlic, peeled
  • Salt and black pepper

1/2 cup ribboned Basil, 2 cups Parmesan, heavy whipping cream (optional)

Start off by preheating your oven to 350 degrees.

Screenshot 2015-10-21 at 10.22.47 AM

1. In a 9 by 13 inch pan, add cans of whole plum tomatoes and using a potato masher, or use a whisk like me if you don’t have one, mash the tomatoes and drain out all the liquids and preservatives in the tray.

Screenshot 2016-04-03 at 7.50.48 PM Screenshot 2016-04-03 at 7.51.07 PM

2. Add peeled garlic cloves, salt, and black pepper into the pan and add only 1/4 cup of olive oil, save the other 1/4 for later. Bake pan for 45 minutes to roast tomatoes until the garlic has softened, stir occasionally.

Screenshot 2016-04-03 at 7.51.21 PM Screenshot 2016-04-03 at 7.51.38 PM Screenshot 2016-04-03 at 7.52.22 PM Screenshot 2016-04-03 at 7.51.52 PM

Screenshot 2016-04-03 at 7.52.38 PM Screenshot 2016-04-03 at 7.52.52 PM Screenshot 2016-04-03 at 7.53.02 PM

3. In a stockpot over medium heat, sauté diced onions and carrots and cook until slightly brown

Screenshot 2016-04-03 at 7.53.26 PM Screenshot 2016-04-03 at 7.53.40 PM Screenshot 2016-04-03 at 7.53.49 PM

4. Add tomato paste, oregano, and Rosemary and stir, add broth and grilled tomato mixture and cover pan, and let soup simmer for 5-10 minutes over medium heat

Screenshot 2016-04-03 at 7.54.02 PM Screenshot 2016-04-03 at 7.54.10 PM Screenshot 2016-04-03 at 7.54.20 PM Screenshot 2016-04-03 at 7.54.29 PM

Screenshot 2016-04-03 at 7.54.41 PM Screenshot 2016-04-03 at 7.54.53 PM Screenshot 2016-04-03 at 7.55.01 PM Screenshot 2016-04-03 at 7.55.58 PM

5. In a blender or using a immersion/hand blender, purée the soup until smooth and chunky; not too long. Add salt and black pepper to the soup to taste

Screenshot 2016-04-03 at 7.57.27 PM Screenshot 2016-04-03 at 7.57.37 PM

For the Parmesan Crisps:

Line a cookie tray with parchment paper and spread out 2 cups of Parmesan cheese on the tray, bake for 5 minutes or until cheese is crispy and hard.

Screenshot 2016-04-03 at 7.56.13 PM Screenshot 2016-04-03 at 7.56.41 PM Screenshot 2016-04-03 at 7.57.02 PM

To prepare a bowl of soup, ladle soup into bowl, break a large chunk of the Parmesan crisp and add to the side bowl. Next pour a little bit of heavy whipping cream into the center of the bowl and garnish basil ribbons on top

Screenshot 2016-04-03 at 7.57.50 PM Screenshot 2016-04-03 at 7.58.11 PM

And there it is: a fancy, warm, and delicious bowl of tomato soup to enjoy with a cheesy cracker.


–  Chef/Author Zubair M. 


Cheese scones

Screenshot 2016-04-01 at 6.20.21 PM

For the fifth day in this weeks spring cooking series, today’s recipe is cheese scones.

Scones are traditionally ate at breakfast kind of like a biscuit but you can always have them as a appetizer at dinner! Just make sure to keep a glass of water by you when making these, they make you really thirsty after eating one!

You can always use a cookie cutter to shape the scones out in fun shapes and sizes but I prefer to stick to the traditional circle shape.

One last thing: When baking these scones in the oven, make sure to keep them kind of far apart, they tend to rise and spread and trust me you don’t want 2 scones sticking together!

Ingredients:

  • 2 cups all purpose flour
  • 1 teaspoon salt
  • 1/4 teaspoon ground black pepper
  • 1 tablespoon baking powder
  • 1 teaspoon granulated sugar
  • 1 stick of butter, sliced into thin squares
  • 1 cup heavy whipping cream
  • 1 cup or more of grated cheddar cheese
  • 1 egg

1. In a food processor fitted with a metal blade, add all dry ingredients and pulse for 10 seconds until well combined

Screenshot 2016-04-01 at 6.14.05 PM Screenshot 2016-04-01 at 6.14.16 PM Screenshot 2016-04-01 at 6.14.26 PM

Screenshot 2016-04-01 at 6.14.40 PM Screenshot 2016-04-01 at 6.14.50 PM Screenshot 2016-04-01 at 6.15.15 PM

2. Once well combined, add slices of butter and pulse until small clumps have formed. After all your butter is pulsed and clumps have formed, turn the food processor on low and gradually add heavy whipping cream while the mixture is being processed.

Screenshot 2016-04-01 at 6.15.27 PM Screenshot 2016-04-01 at 6.15.39 PM Screenshot 2016-04-01 at 6.15.48 PM

Pulse until a shaggy dough forms and holds together as shown below. Also, this is a good time to preheat the oven to 350 degrees.

Screenshot 2016-04-01 at 6.15.56 PM Screenshot 2015-10-21 at 10.22.47 AM

3. Lightly flour a work surface and roll out the dough and knead for a couple of minutes

Screenshot 2016-03-29 at 8.01.56 PM Screenshot 2016-04-01 at 6.16.18 PM Screenshot 2016-03-29 at 8.02.12 PM

Once your dough is needed, sprinkle some cheddar cheese on top of it and knead for a couple of more minutes so the cheese gets mixed into the dough

Screenshot 2016-04-01 at 6.17.00 PM

4. Cut up dough into 8 equal pieces, you can cut the dough into more than 8 pieces but then the scones will be too small. Now to form a scone properly, you have to sprinkle some cheese on top of it, fold it in half, and fold the half in fourths and grab this folded scone, place on cookie tray and press down on scone so it isn’t too thick. Repeat process with all scones.

Screenshot 2016-04-01 at 6.17.11 PM Screenshot 2016-04-01 at 6.17.24 PM Screenshot 2016-04-01 at 6.17.34 PM

Screenshot 2016-04-01 at 6.17.44 PM   Screenshot 2016-04-01 at 6.17.51 PM

5. In a bowl, beat the egg with a whisk or fork and egg wash all the scones using a pastry brush . Once all scones are egg washed, sprinkle some more cheese on top of the scones to make them nice and cheesy

Screenshot 2016-04-01 at 6.18.03 PM Screenshot 2016-04-01 at 6.19.33 PM Screenshot 2016-04-01 at 6.19.43 PM

6. Bake in preheated oven for 15 minutes until golden brown.

Screenshot 2016-04-01 at 6.19.54 PM Screenshot 2016-04-01 at 6.20.03 PM Screenshot 2016-04-01 at 6.20.13 PM

Summary:

1 cup of cheese is the average amount you should use when making these cones but as most of you saw, I like to go all out and use more than one cup. The more the better!

Screenshot 2016-04-01 at 6.20.28 PM Screenshot 2016-04-01 at 6.20.21 PM

That’s how one scone looks up close

I repeat, it’s best to have a glass of water by you, these make you really thirsty!

Ever had one of those buttery and mouth watering biscuits from popeyes or red lobster? Now I usually don’t like to be those people who act like there food is really good when it probably taste like cat food, but these scones taste just like a butter biscuit from popeyes and red lobster!

Don’t think so? Then follow this recipe, eat the scones and compare it with the biscuits. These scones serve as a really good appetizer and the melted cheese on top is like the icing to the cake.

Enjoy your scones! Till tomorrows recipe….

Chef/Author Zubair M. 


Chicken pot pie

Screenshot 2016-03-31 at 6.32.44 PM Screenshot 2016-03-31 at 6.33.38 PM

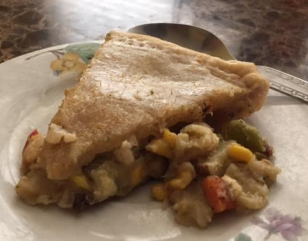
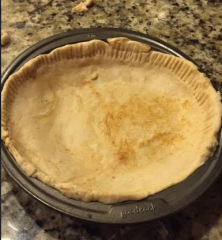
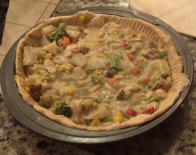
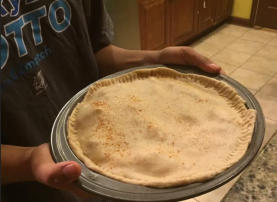
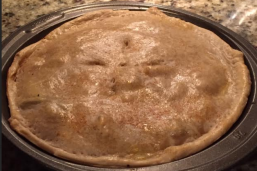
For the 4th day in the spring cooking series, today’s recipe is chicken pot pie! Above are how mines turned out.

Before creating my own recipe, I looked over a sur la table recipe I learned on how to make chicken pot pie and compared it to a bunch of other recipes online and adjusted measurements, add a few things here and there and now I have my own recipe!

What I really like about chicken pot pies is the nice and creamy filling hiding inside the pie crust. When adding milk to make the veggies and chicken creamy, you have to remember to cook it well enough until the vegetables and chicken absorbs the milk and broth and a gravy is formed.

You can use any vegetables you want! Some people use garlic but…. I don’t prefer it. Also, many people like to add the raw chicken breast pieces into the broth and veggies and let the chicken cook in with the mixture but the truth is, you should always cook the chicken first before adding it in. It never cooks proper with the broth and veggies and takes a long time so your better off cooking the chicken first and then adding it in.

Recipe for the pie crust used can be found on this link of my pie crust post:  https://bakedtothebone.wordpress.com/2016/03/29/perfect-pie-dough/

Without further ado, chicken pot pie:

Yields 2 pot pies

Ingredients:

  • 1 pound mixed vegetables (corn, broccoli, etc)
  • 2 medium potatoes
  • 1 yellow onion
  • 1 large carrot
  • 1 cup vegetable broth
  • 1 cup regular milk
  • Honey
  • 2 tablespoons olive oil
  • 1 teaspoon garlic powder
  • Parsley flakes
  • 1 recipe perfect pie crust
  • Cayenne pepper powder
  • 3 tablespoons all purpose flour
  • 3 tablespoons unsalted butter
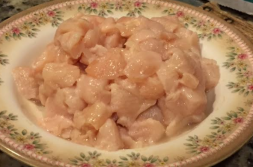
  • 1 pound diced and cubed chicken breast
  • Salt and pepper

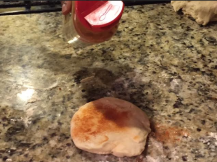
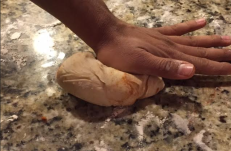
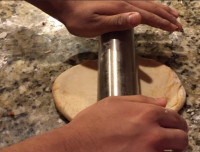
1. Flour a work surface and roll out pie crust dough. Season with cayenne pepper for spice, knead for a little while and roll out with rolling pin until it can fit the pie pan

Screenshot 2016-03-31 at 6.23.41 PM Screenshot 2016-03-31 at 6.23.51 PM Screenshot 2016-03-31 at 6.23.59 PM

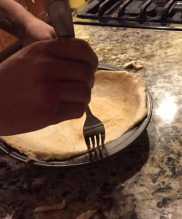
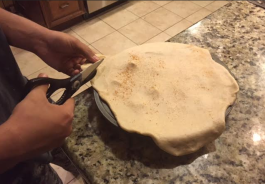
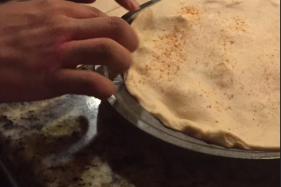
2. Gently grab rolled pie dough, make sure it isn’t too thin, and place over pie pan. Using kitchen shears, cut off any excess pie dough from around the pan and using a fork, press down the dough against the pan until the sides are properly covered.

Screenshot 2016-03-31 at 6.24.11 PM Screenshot 2016-03-31 at 6.24.19 PM Screenshot 2016-03-31 at 6.24.27 PM

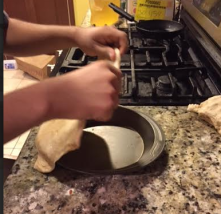
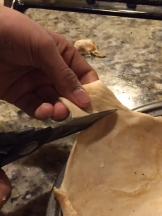
Once pie crust dough is properly adjusted to the pan, set aside

Screenshot 2016-03-31 at 6.24.35 PM

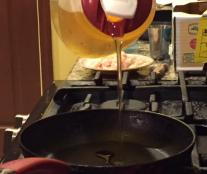
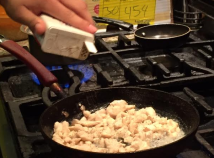
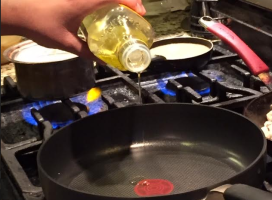
3. Over medium heat in a skillet, add some oil. Once the oil is hot, add in your raw diced chicken breast. Make sure they are cut into little cube and bite size pieces.

Screenshot 2016-03-31 at 6.26.33 PM Screenshot 2016-03-31 at 6.26.42 PM Screenshot 2016-03-31 at 6.26.55 PM

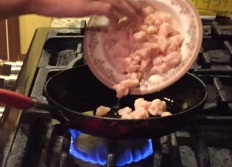
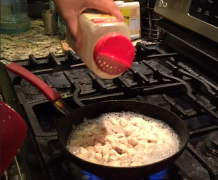
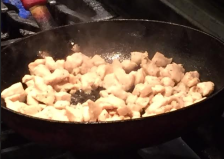
4. Add garlic powder, salt, and pepper to the chicken. Cook until the chicken breast is nice and white. Once cooked, set aside.

Screenshot 2016-03-31 at 6.27.03 PM Screenshot 2016-03-31 at 6.27.14 PM Screenshot 2016-03-31 at 6.27.23 PM

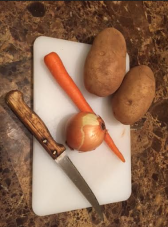
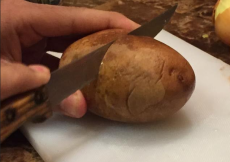
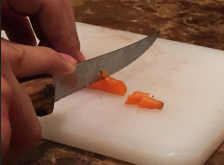
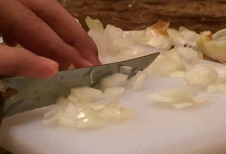
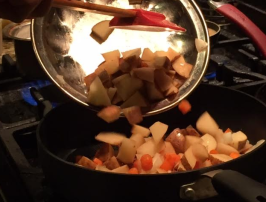
5. Now that we have our chicken cooked, lets begin to slice our vegetables. On a cutting board, dice potatoes into cubes and chop the onion and carrot into small pieces.

Screenshot 2016-03-31 at 6.25.25 PM Screenshot 2016-03-31 at 6.25.43 PM Screenshot 2016-03-31 at 6.25.51 PM

Screenshot 2016-03-31 at 6.26.04 PM Screenshot 2016-03-31 at 6.26.14 PM Screenshot 2016-03-31 at 6.26.22 PM

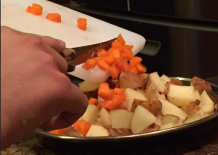
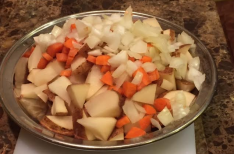
6. Once the potatoes, carrot, and onion are nice and diced as shown above, set aside plate. Place a saute pan over medium heat and add olive oil and chopped vegetables and saute for 5 minutes until the potatoes are tender

Screenshot 2016-03-31 at 6.27.36 PM Screenshot 2016-03-31 at 6.27.52 PM

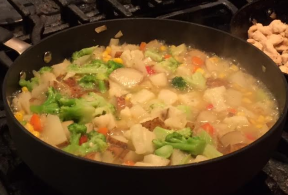
7. Once potatoes are tender, add your thawed package of mixed vegetables into the pan and season with black pepper and add in the three tablespoons of butter and stir until butter melts

Screenshot 2016-03-31 at 6.28.02 PM Screenshot 2016-03-31 at 6.28.45 PM

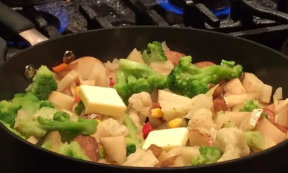
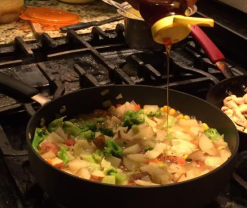
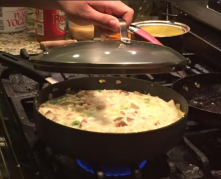
8. Once the butter melts, add vegetable broth to the pan, season vegetables with parsley flakes and stir once again

Screenshot 2016-03-31 at 6.28.56 PM Screenshot 2016-03-31 at 6.29.04 PM Screenshot 2016-03-31 at 6.29.13 PM

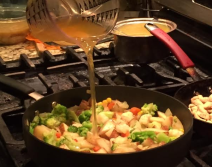
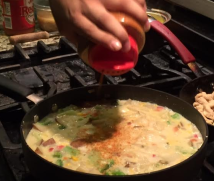
People usually get surprised when they know I add honey into my pot pies but it’s kind of my secret ingredients. Drizzle some honey onto the vegetables to give a sweet flavor. But not too much! At this point your vegetables should be nice and steamed and the vegetable broth should be sizzling

Screenshot 2016-03-31 at 6.29.24 PM Screenshot 2016-03-31 at 6.29.34 PM

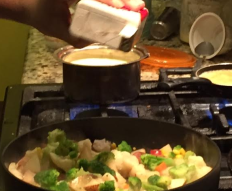
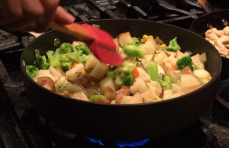
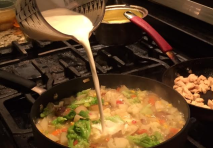
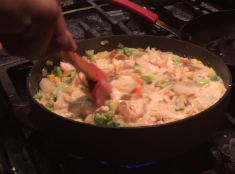
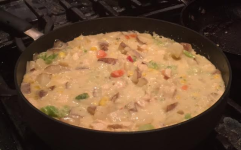
9. Once broth is sizzling and vegetables are tender, add milk and flour and stir.

Screenshot 2016-03-31 at 6.29.42 PM Screenshot 2016-03-31 at 6.30.03 PM Screenshot 2016-03-31 at 6.30.12 PM

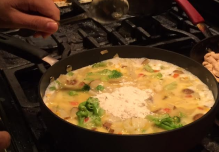
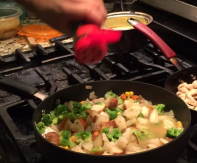
10. Add some cayenne pepper on top of the vegetables (you can add as much as you want but I like to put alot because I prefer my food spicy). Toss in the cooked chicken and give the mixture a nice stir

Screenshot 2016-03-31 at 6.30.20 PM Screenshot 2016-03-31 at 6.30.28 PM Screenshot 2016-03-31 at 6.30.36 PM

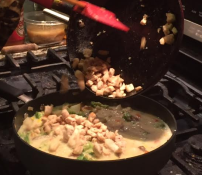
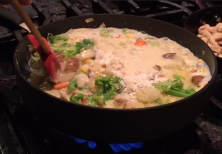
Cover the pan with a lid and let the saute pan sit for 5 minutes to let the chicken and vegetables absorb the milk

Screenshot 2016-03-31 at 6.30.46 PM

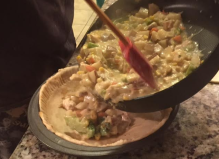
11. When you remove the lid, the milk should be very thick like gravy. If the milk is still in a very liquid form, add more flour and let sit for another minute. It’s urgent your milk and broth should be very thick and chunky before adding mixture into the pie. Add half of the vegetable and chicken mixture into the pie pan. There’s a lot so you can pull of a second pie!

Screenshot 2016-03-31 at 6.30.59 PM Screenshot 2016-03-31 at 6.31.07 PM  Screenshot 2016-03-31 at 6.31.16 PM

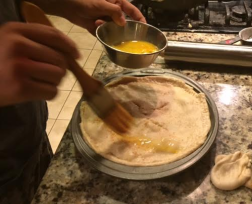
12. Roll out remaining dough and cover the top of the pie, adjust the sides with your fingers and cut off any excess dough. Using a knife, cut a X onto the pie so the hole can ventilate the heat from inside the pie. Using a pastry brush, egg wash the top of the pie with whisked egg yolk.

Screenshot 2016-03-31 at 6.31.33 PM Screenshot 2016-03-31 at 6.31.41 PM

Screenshot 2016-03-31 at 6.31.49 PM Screenshot 2016-03-31 at 6.32.10 PM

Bake the pie at 350 degrees for 25 minutes until the crust is golden brown.

Screenshot 2016-03-31 at 6.32.33 PM

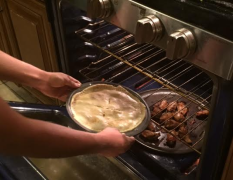
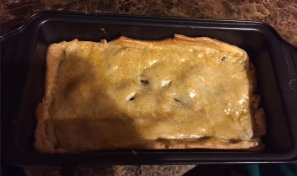
Here’s how mines came out of the oven, I even decided to make a second pie using some of the left over vegetable mix, the picture on the right is the second pie.

Screenshot 2016-03-31 at 6.32.44 PM  Screenshot 2016-03-31 at 6.33.00 PM

Summary:

Pot pie are best ate hot! the best part I love about eating these pies is that when you take your fork or spoons and cut out a pieces, there’s nice and creamy vegetable filling pouring out. Here’s a slice of my pie when I cut it out.

Screenshot 2016-03-31 at 6.33.38 PM

Although this recipes requires a lot of time, it’s well worth it if your looking to make a scrumptious family dinner. Plus, I’m pretty sure pot pies are healthy, so many vegetables!

I cooked my chicken using a rubber spatula and later went on to saute the vegetables with the same spatula. If your planning to use the same spatula for both steps, makes sure to clean it first like I did after cooking the chicken. . Or you can just use a different spatula but make sure to avoid cross contamination.

Tomorrow’s recipe will be Cheese scones! If you thought this recipe was awesome, wait till you check out tomorrows! Now if you excuse me I need to chow down on this creamy and flavorful pot pie with my family! Dinner is served.

I think from all the recipes I have made on this blog, this might be the best!

– Chef/Author Zubair M. 


Strawberry macarons with Chocolate ganache

 Screenshot 2016-03-31 at 12.17.36 AM

For the third recipe of the third day in this weeks spring cooking series, we will be making strawberry macarons with chocolate ganache.

I guess most of you at this point probably know where I learned the art of making macarons. Yup it’s that amazing place I’m always talking about… Sur la table.

Macarons are one of the most classic french desserts next to creme brulee and croissants. No matter what flavor macaron it is, you can always eat them after they have cooled from coming out of the oven but macarons are even tastier with filling in between them and are traditionally ate like that.

My favorite filling and the most popular one is chocolate ganache. Ganache is real simple and just made out of three ingredients! Enough talking and lets see how these little buns are made. Ganache recipe included.

Ingredients:

  • 1 cup confectioners sugar
  • 1/2 cup all purpose flour
  • 2 tablespoons grated or powdered freeze dried strawberries
  • 4 egg whites
  • 1/2 cup granulate sugar
  • Pinch of cream of tartar
  • Pink food coloring
  • 1 recipe chocolate ganache

1. In a food processor bowl fitted with a metal blade, add 1/3 of the confectioners sugar with the flour and strawberry powder until a light pink fine powder is formed.

Screenshot 2016-03-31 at 12.11.30 AM Screenshot 2016-03-31 at 12.11.37 AM Screenshot 2016-03-31 at 12.11.45 AM Screenshot 2016-03-31 at 12.11.53 AM

2. Add the remaining confectioners sugar and pulse once again until a fine powder is formed, set aside bowl

Screenshot 2016-03-31 at 12.12.03 AM

3. Add the egg whites and pinch of cream of tatar in a stand mixer bowl with the whisk attachment and turn the mixture on high speed to make meringue. Once the eggs white are foamy, gradually add the granulated sugar

Screenshot 2016-03-31 at 12.12.09 AM Screenshot 2016-03-31 at 12.12.18 AM Screenshot 2016-03-31 at 12.12.30 AM

Screenshot 2016-03-31 at 12.12.57 AM Screenshot 2016-03-31 at 12.13.04 AM

4. Once all the sugar is added, drop in a few drops of pink food coloring and keep the mixture on high until stiff glossy peaks form. One technique I use and was taught to check the meringue is ready is turn off the mixer and take off the whisk attachment and dip it into the creamy meringue and hold it up, if the meringue hangs down like below it’s not ready, but if it faces up and stays in it’s position, glossy peaks have formed.

Screenshot 2016-03-31 at 12.13.10 AM Screenshot 2016-03-31 at 12.13.18 AM Screenshot 2016-03-31 at 12.13.31 AM

5. Once glossy peaks have formed, take the bowl off the mixer and add the flour mixture into the bowl. YOU CAN NOT INCORPORATE THE FLOUR MIXTURE BY USING THE MIXER! if you mix the flour mixture into the meringue using your mixer, your macarons will be ruined. Use a bench scraper of rubber spatula and gently fold the mixtures together. One way to check it’s fully incorporated is by lifting the spatula up, if the mixture slowly drips down from the spatula it’s ready.

Screenshot 2016-03-31 at 12.13.42 AM Screenshot 2016-03-31 at 12.13.56 AM Screenshot 2016-03-31 at 12.14.05 AM

6. Transfer batter to a pastry bag with a plain round tip nozzle and line two 9 by 13 inch cookie trays with parchment paper. Pipe nice and small circles onto the cookie trays. You should be able to make 24.

Screenshot 2016-03-31 at 12.14.14 AM Screenshot 2016-03-31 at 12.14.24 AM Screenshot 2016-03-31 at 12.14.35 AM

7. Tap the cookie trays on your counter to release any air bubbles and let the trays sit for 15 minutes until a crust forms on top of the macarons. After 15 minutes, place trays in preheated oven and let cook for 10 to 15 minutes rotating the pans halfway through baking.

Screenshot 2016-03-31 at 12.14.47 AM Screenshot 2016-03-31 at 12.14.58 AM Screenshot 2016-03-31 at 12.15.17 AM

Chocolate ganache:

While the macarons are cooling, this would be a great time to get started on making our chocolate ganache.

Ingredients:

  • 3/4 cup heavy whipping cream
  • 1 cup semisweet chocolate chips
  • 1 tablespoon softened butter

1. In a saucepan, heat the heavy whipping cream over medium heat until it simmers and bubbles around the edges

Screenshot 2016-03-31 at 12.15.26 AM Screenshot 2016-03-31 at 12.15.42 AM

2. In a bowl, add the chocolate chips and pour the hot cream over the chocolate and let sit for a couple of seconds

Screenshot 2016-03-31 at 12.15.34 AM Screenshot 2016-03-31 at 12.15.53 AM Screenshot 2016-03-31 at 12.16.09 AM

3. Whisk together the milk and chips until nice and oozy chocolate syrup is formed, add in butter and whisk once again until nice and thick

Screenshot 2016-03-31 at 12.16.18 AM Screenshot 2016-03-31 at 12.16.41 AM Screenshot 2016-03-31 at 12.16.59 AM

Back to the macarons:

Now that you have the best chocolate ganache made, transfer the ganache into a pastry bag and flip around half of the macarons bottom side up. Squirt a good circle of chocolate into the macarons but not too much or else it will ooze out! Grab a macaron without a macaron on it and stack it on top like a sandwich to form a perfect macaron.

Screenshot 2016-03-31 at 12.17.23 AM   Screenshot 2016-03-31 at 12.17.50 AM

That’s how mines turned out 🙂

Summary: 

When I was grocery shopping the other week and I saw on my list of ingredients I needed freeze dried strawberry’s, I didn’t see the point in buying a whole pack of freeze dried strawberries just for this recipe! what else could they be used for!

So I decided to make mines at home, to make freeze dried strawberry’s at home and save money, just clean 4 fresh strawberries and dry them out very well. Cut them into halves and place them in a ziploc bag. Put the bag of strawberries in a bag of ice and salt and refigerate overnight and boom you have freeze dried strawberry’s.

I just threw in these home freeze dryed strawberry’s into a food processor and if you pulse it a couple of times, the strawberries will trun into powder and be ready to be used for this recipe.

Macarons are amazing! Especially these one, they’re nice and soft and tae like strawberry’s with a nice touch of bitter and mouth watering chocolate ganache. Who doesn’t love chocolate ganache?

These burn fast so make to monitor them when in the oven and if you the best recipe for chocolate ganache that nice and simple, follow the one right above. Doesn’t that oozing melted chocolate look great!

If you have leftover ganache like I did, you can always make a chocolate ganache pie! Looking past these delightful bite size treats, tomorrows recipe of the day will be homemade chicken pot pie! Trust me, I know how to make one delicious pot pie! I have my own recipe.

Till then….

– Chef/Author Zubair M.


Berry tartlets

Screenshot 2016-03-29 at 8.04.48 PM

For the second recipe in this weeks spring cooking series, I will be making berry tarts.

The tarts are nice and sweet and the outer bread part is made of pie crust dough and is stuff with mixed assorted berries in the inside so once you take a bite out of one of these bad boys, those berry’s will kick right in!

The pie dough I used for this recipe I kept chilled for a couple of hours before rolling it out for this recipe because for best results, the pie dough must be refrigerated for at least 30 minutes or longer.

I used the dough I made and taught in the post before this one, follow this link for the recipe for perfect pie dough, https://bakedtothebone.wordpress.com/2016/03/29/perfect-pie-dough/

You can use any berry’s you want but the best combination of berry’s for these tarts is blueberry’s, raspberry’s, and blackberry’s.

Ingredients:

  • 1 pound thawed assorted berries
  • 1 cup granulated sugar
  • 1 teaspoon lemon juice
  • 2 tablespoons cornstarch
  • 1/2 teaspoon vanilla extract
  • 1/4 teaspoon salt
  • 1 recipe perfect pie crust (link above)
  • 1 large beaten egg

1. In a bowl, gather assorted and thawed berries, add sugar and gently stir with silicone spatula

Screenshot 2016-03-29 at 8.00.40 PM Screenshot 2016-03-29 at 8.00.47 PM Screenshot 2016-03-29 at 8.00.55 PM

2. Next add cornstarch, salt, lemon juice, and vanilla extract and gently stir and set the bowl aside, it’s urgent to use a rubber spatula to avoid mashing the berries

Screenshot 2016-03-29 at 8.01.12 PM Screenshot 2016-03-29 at 8.01.03 PM Screenshot 2016-03-29 at 8.01.20 PM

Screenshot 2016-03-29 at 8.01.27 PM Screenshot 2016-03-29 at 8.01.35 PM Screenshot 2016-03-29 at 8.01.43 PM

At this point you should preheat your oven to 350 degrees.

Screenshot 2015-10-21 at 10.22.47 AM

3. Dust a work surface with flour and lightly knead the pie crust dough for a little while

Screenshot 2016-03-29 at 8.01.56 PM Screenshot 2016-03-29 at 8.02.02 PM Screenshot 2016-03-29 at 8.02.12 PM

4. Once kneaded, using a rolling pin, roll out the dough on both sides until it isn’t too thin, around 1/8 inch thick and begin to cut out the dough into circles using a round cookie cutter

Screenshot 2016-03-29 at 8.02.19 PM Screenshot 2016-03-29 at 8.02.29 PM Screenshot 2016-03-29 at 8.02.38 PM

5. Scoop about a tablespoon of the berry mix into two of the circles and cover the top of them with the remaing circles of dough and using your fingers or a fork, tap on the edges to seal the tart

Screenshot 2016-03-29 at 8.02.54 PM Screenshot 2016-03-29 at 8.03.02 PM Screenshot 2016-03-29 at 8.03.13 PM

Line them on a prepared and greased 9 by 13 inch pan

Screenshot 2016-03-29 at 8.03.35 PM

6. In a separate bowl, crack an egg and whisk it and using a pastry brush, brush the egg wash on top of all 6 of your tarts and sprinkle some sugar on top of the egg washed tarts

Screenshot 2016-03-29 at 8.03.42 PM Screenshot 2016-03-29 at 8.03.52 PM Screenshot 2016-03-29 at 8.04.01 PM

7.  Place tray of tarts in oven and bake for 15 minutes or until golden brown, make sure to cut a x into your tarts so the heat could ventilate.

Screenshot 2016-03-29 at 8.04.09 PM Screenshot 2016-03-29 at 8.04.32 PM

Summary:

It’s okay if some of the juice from the berries leak from your tarts, it’s normal. The only bad thing about it is that it will baked into your pan and give you a hard time to clean off.

They might look like fattened bread but once you bite into these bad boys, sweet berries will pile into your mouth. It will taste like your eating a berry pie! but just smaller…

Be warned that things will get messy. For tomorrow (the third day in the spring cooking series) I will be making strawberry macarons with chocolate ganache so keep an eye out for that.

And remember the recipe for the pie crust dough used and needed for making these tarts can be found in the link at the top of the page or if you scroll down to the post before this, the recipe for the dough will be there.

– Chef/Author Zubair M


Perfect Pie dough

Screenshot 2016-03-29 at 2.33.03 AM

For the second day in this spring cooking series, I will be teaching how to make Berry tarts or also known as hand pies.

We can’t move on to making the tarts until making perfect pie dough best for flaky and soft crusts.

Here’s the best recipe I was taught by a chef instructor at a cooking class for perfect pie dough. The pie dough will be needed when making the berry tarts I will be showing in the post after this.

This recipe is really simple and makes the best buttery pie crust! You can use a food processor like I did or you can use a pastry blender to incorporate the butter into the flour.

One last thing, this recipe for pie crust is used for sweet and savory pie. But, if you are making savory pies such as chicken pot pie, use a teaspoon of sugar instead of two tablespoons. If your making tarts and treats like I am, use the full 2 tablespoons of sugar.

Ingredients:

  • 1 1/4 cups all purpose flour
  • 1 stick unsalted butter
  • 2 tablespoons granulate sugar
  • 1/4 teaspoon salt
  • 1/4 cup water or less

1. In a food processor fitted with a metal blade, add flour, sugar, and salt and pulse for a couple of seconds

Screenshot 2016-03-29 at 2.26.45 AM Screenshot 2016-03-29 at 2.26.53 AM Screenshot 2016-03-29 at 2.27.02 AM

Screenshot 2016-03-29 at 2.27.10 AM Screenshot 2016-03-29 at 2.27.20 AM

2. Chop up the stick up butter into thin slices, add into the bowl and yet again pule the mixture for a couple of more seconds until large clumps are formed

Screenshot 2016-03-29 at 2.27.41 AM Screenshot 2016-03-29 at 2.27.54 AM Screenshot 2016-03-29 at 2.28.08 AM

3. Turn the food processor to low and while its processing, gradually add water until the dough comes together

Screenshot 2016-03-29 at 2.28.35 AM Screenshot 2016-03-29 at 2.28.18 AM Screenshot 2016-03-29 at 2.28.48 AM

4. Turn off food processor, slightly grease a bowl with spray or butter, convert the nice soft dough into the bowl, cover the bowl with plastic wrap and refrigerate the dough at least 30 minutes or overnight before use.

Screenshot 2016-03-29 at 2.29.00 AM  Screenshot 2016-03-29 at 2.29.17 AM

Screenshot 2016-03-29 at 2.29.28 AM  Screenshot 2016-03-29 at 2.29.39 AM

Summary:

Wasn’t that easy?

Considering most of the recipes I post on this blog I split into about 8 steps unnecessarily, this 4 step pie crust is fairly easy and short. Not to mention it’s nice and flaky and goes good with any pie but remember, if your making a savory pie, omit the sugar to one teaspoon.

Some people refrigerate it over night and that makes the dough even more flaky but its not necessary, You should at least chill it for 30 minutes at the bare minimum or else this dough will fall apart when baked.

Now that my pie dough is made and taught so most of you can follow along, I’m going to let it refrigerate for a little over 30 minutes for even better results and in a little while I will get back to you guys with another recipe post on how to make berry tarts using this pie crust recipe.

If you want the best pie crust or tarts… you know where to find this post

– Chef/Author Zubair M.


Thai coconut chicken soup

Screenshot 2016-03-27 at 7.04.13 PM

For the first recipe post in the spring cooking series, I will be making Thai coconut chicken soup, also known as Tom kha kai.

This soup is a nice combination of sweet (coconut milk, sugar) and savory (Chicken, spice). I first encountered this recipe in a authentic Thai cooking class I was taking at Sur la table. More information on the class can be found on my post: https://bakedtothebone.wordpress.com/2015/12/01/thai-cooking-class-as-sur-la-table/

Not only is this soup spicy but its really easy! But you will have to take some time cutting up all the required vegetables.

I personally like to add 6 Thai chili peppers to my soup because I prefer spice but you can always lower it down to at least 3 peppers for decent flavor.

I highly recommend having everything chopped and sliced up before hand so while following the steps you can just toss all the veggies in without having to cut them right on spot.

Lets see how its made:

Ingredients:

  • 4 cups vegetable or chicken broth
  • 1 (13 ounce) can coconut milk
  • 2 garlic cloves
  • 1 piece fresh ginger
  • 6 Thai chilies
  • 2 tablespoons fish sauce
  • 4 limes, juiced
  • 1/4 cup cilantro, chopped
  • 4 cups shitake or button mushrooms
  • 1 1/2 teaspoon sugar
  • Salt and black pepper to taste

1. In a saucepan or any pan you feel like using, bring broth to simmer over medium heat

Screenshot 2016-03-27 at 8.02.40 PM  Screenshot 2016-03-27 at 8.02.49 PM

2. Using a mortar and pestle, crush up the two peeled garlic cloves and toss into the pan along with the sliced chilies and ginger

Screenshot 2016-03-27 at 8.03.04 PM Screenshot 2016-03-27 at 8.03.14 PM Screenshot 2016-03-27 at 8.03.27 PM

3. Add salt and give the soup a nice stir, lower the heat to low, cover and let simmer for 10 minutes

Screenshot 2016-03-27 at 8.03.43 PM Screenshot 2016-03-27 at 8.03.51 PM Screenshot 2016-03-27 at 8.04.00 PM

4. Uncover the soup after 10 minutes and add sugar, fresh lime juice and fish sauce

Screenshot 2016-03-27 at 8.04.13 PM Screenshot 2016-03-27 at 8.04.21 PM Screenshot 2016-03-27 at 8.04.31 PM

5. Chop up all the cilantro and add it into the pan and stir

Screenshot 2016-03-27 at 8.04.42 PM Screenshot 2016-03-27 at 8.04.51 PM Screenshot 2016-03-27 at 8.05.00 PM

6. Add the black pepper and the entire can of coconut milk and stir, your soup should have a nice white color

Screenshot 2016-03-27 at 8.05.24 PM  Screenshot 2016-03-27 at 8.05.39 PM

7. Finally, toss in the sliced mushrooms, stir the soup one last time, and cover the pan and let the soup sit for about 5 minutes the mushrooms can soften and absorb the nice spicy soup. After 5 minutes, serve in bowls and enjoy

Screenshot 2016-03-27 at 8.05.48 PM Screenshot 2016-03-27 at 8.05.56 PM Screenshot 2016-03-27 at 8.06.03 PM

Summary:

This soup is best drank hot and is the perfect drink for cold days which living in Chicago has taught me.

If you didn’t know any Thai cooking at all or any Thai recipe, you do now! I adjusted this recipe from the one Sur la table gave me. You can always add some lemongrass into the soup like Tom ka khai traditionally requires but lemongrass cannot be swallowed and can’t be chewed so why add it in?

As most of you know from reading my creme brulee post (post before this one) , this whole week I will be cooking a new recipe each day as a part of spring cooking. Therefore I will be posting the recipe for each dish everyday! 6 more day of continuous cooking and posting!

I hope everyone enjoys this recipe and makes it at home, its amazing! Tomorrow for the second post in my spring cooking series, I will be making berry tartlets! Make sure to check that out.

– Chef/Author Zubair 


Crème brûlée


Screenshot 2016-03-25 at 4.27.08 PM

Spring break is finally here! And what other way to celebrate break than making the French classic, Creme brulee. That’s how mines turned out.

Crème brûlée was first found in a 1961 cook book published by François Massialot. This rich and fancy dessert is still famous today and is only served in the fanciest and best of restaurants in France.

I first encountered this recipe in a Sur la table class I was taking and made it ever since, so why not share the recipe?

The interesting thing about this recipe is having to sprinkle sugar on top of the custard and using a torch, burning/caramelizing the sugar. This gives a nice and crunchy taste to go with the contrasting soft spongy custard.

I don’t have a chefs torch at home because I didn’t feel the need to buy a $20 tool I would rarely use so one way to burn the sugar on top instead of using a torch is by turning on the oven broiler and resting the creme brulee ramekins under it so the sugar is directly under high heat.

Without further ado, the recipe for Creme Brulee.

Ingredients: 

  • 1/2 cup Regular milk
  • 1/2 cup Heavy whipping cream
  • 1/6 cup Granulated sugar
  • 1/2 teaspoon Salt
  • 1 teaspoon Vanilla extract

1. Preheat oven to 350 degrees

Screenshot 2015-10-21 at 10.22.47 AM

2. In a heavy metal saucepan, add cup milk and heavy whipping cream and set under medium heat

Screenshot 2016-03-25 at 4.22.53 PM   Screenshot 2016-03-25 at 4.23.03 PM

Screenshot 2016-03-25 at 4.23.12 PM   Screenshot 2016-03-25 at 4.23.21 PM

Once the edges of the cream and milk mixture begin to bubble as below, remove saucepan from heat.

Screenshot 2016-03-25 at 4.23.30 PM

3. In a mixing bowl, add the 4 eggs and whip

Screenshot 2016-03-25 at 4.23.45 PM  Screenshot 2016-03-25 at 4.23.53 PM

4. Next, add sugar, salt, and vanilla extract and mix using a whisk until well combined.

Screenshot 2016-03-25 at 4.24.02 PM  Screenshot 2016-03-25 at 4.24.11 PM

Screenshot 2016-03-25 at 4.24.20 PM  Screenshot 2016-03-25 at 4.24.40 PM

5. Grab your saucepan with the milk mixture and with one hand begin to pour the liquid slowly into the egg mixture while mixing with the other hand. Your combined and whipped mixture should be light yellow and have a nice scent

Screenshot 2016-03-25 at 4.24.49 PM  Screenshot 2016-03-25 at 4.24.59 PM

6. Grease 6 four ounce ramekins so the custard will not stick when baked. Divide the mixture evenly into each ramekin

Screenshot 2016-03-25 at 4.25.10 PM  Screenshot 2016-03-25 at 4.25.28 PM

7. Place the ramekins in a glass baking dish and fill the dish (not the ramekins) with warm tap water halfway up the ramekin bowls, cover the baking dish with aluminum oil and very very carefully place both dishes into the oven. It’s urgent you walk very slowly and be careful because if any of the water gets into the ramekins, the brulee will be ruined. By the way, aluminum foil is used so direct heat is not applied to the ramekins or else the eggs will cook too fast! Bake for 35 minutes.

Screenshot 2016-03-25 at 4.25.37 PM  Screenshot 2016-03-25 at 4.25.53 PM

Screenshot 2016-03-25 at 4.26.10 PM

Occasionally every 5 to 10 minutes check the dish to make sure the creme brulee isn’t burning if it looks like this or if the baked brulee has some white liquid on top of it like this, that liquid is uncooked batter so let it cook more

Screenshot 2016-03-25 at 4.26.30 PM

8. After 35 minutes the creme brulee should look like below. Remove from oven very carefully, dump out water and let the ramekins sit out for ten minutes and then move them into the fridge for another 30 minutes so cooled.

Screenshot 2016-03-25 at 4.26.45 PM  Screenshot 2016-03-25 at 4.26.53 PM

9. After cooling in the fridge, remove the ramekins from the fridge, sprinkle about a tablespoon of granulate sugar on top of each creme brulee and move around the ramekin so the sugar covers all sides of the baked creme brulee. Once covered in sugar, use a torch and caramelize the sugar on top or if you don’t a torch, place ramekins directly under boiler for direct heat and the sugar will still caramelize.

Screenshot 2016-03-25 at 4.27.08 PM

Summary:

Most recipes for Creme brulee require a ton of ingredients and so much steps but this recipe is not too hard and only uses 5 ingredients and still taste authentic!

Here’s how all of my Creme brulee’s turned out:

Screenshot 2016-03-25 at 4.27.17 PM

They were really good and turned out beautiful… for the most part. Although using a broiler is a substitution for torching the Creme Brulee, you can’t stop the broiler from over burning the sugar because you can’t move it around like a butane torch so some parts of the creme brulee sugar were burned fine and some were over burned while others weren’t burned at all! That’s why I highly recommend using a torch.

This dish is really delicious and fancy! It serves a great dessert after dinner or a nice dessert to impress all your guests and make them think “Wow this person’s professional”.

I am glad to announce that starting from monday, I am cooking every single day of spring break! I am making many different dishes to practice past learn skills. I will be cooking this Monday, Tuesday, Wednesday, Thursday, Friday, and Saturday.

So that’s why a day after making each dish, I will post the recipe and start a Spring recipe post series each days of the week next week for spring cooking.

Before I got, make sure to make the right decisions in voting in state primary’s, if a certain someone with the slogan “Make America Great again” is nominated our president, might as well move out of here because things will be a disaster! The vote is your choice and I hope everyone votes for who they want but at the end of the day do we really want someone like Trump?

Thanks and make sure to visit my blog next week for my spring cooking series and get some nice recipes!  🙂

    – Chef/Author Zubair M.